.svg)

In our exemplary NativeScript project we will build is game in which a user selects a category of questions and answer them. We will improve this app by adding a time limit for the answer and enabling to change game settings This is how the app should look like in the end but let's start from the very beginning by introducing NativeScript framework.


What is NativeScript?
While most of the attention in cross-platform mobile development is paid to the competition of React Native and Flutter there’s another alternative right behind the corner having an interesting offer for software developers. NativeScript, an open-source framework created by Progress Software enables to write one source code in JavaScript which is afterward compiled to languages like Objective-C /Swift for iOS and Java for Android. This makes it work on both platforms and keep native optimization as opposed to hybrid apps which are shown in a web view in the browser.
Great advantage distinguishing NativeScript from other solutions is freedom in the way you write code. It enables to create mobile apps in different combinations like:
- Nativescript + Angular;
- Nativescript + Vue.js;
- Nativescript + TypeScript;
- Nativescript + JavaScript.
As you can see the choice is pretty wide thanks to NativeScript’s open-source nature enabling to contribute by devs with different coding preferences. This s exactly the way how Vue.js implementation to NativeScript has been established.

What do you need to know at the very beginning?
In our articles, we will use NativeScript with Angular so you will need to be familiar with the second one and also with Typescript at least at the basic level. However, you don’t need to know NativeScript on its own. It has a shallow learning curve and I’ll be explaining the components we’ll use on the way. I also recommend looking regularly in the documentation because it’s written in a clear and intelligible way.
Let’s start!
The first thing we need to do is to prepare a work environment and install Nativescript CLI. If you have created any mobile apps e.g. using React Native, you’ll halfway through the success.
Installing Nativescript CLI usually comes down to run one command in the terminal:
npm install -g nativescript@5.4.2
If you’ll meet any problems, check the official documentation where you’ll find a detailed description of the set-up process. You will also find there a step-by-step guide about preparing an environment for your operating system and install particular phone emulators which is useful in case it’s the first mobile app you build:
- macOS
- Linux
- Windows
Repository and structure
Before we will start any coding you’ll need to use my starting repository. It is divided into steps following which we will develop our game. After finishing every each of them I recommend joining next one through the particular branch. It will provide CSS files for existing components to our app. You can also copy CSS files directly from the repository without changing branches if you prefer this way better.
So to sum up: we download our repository and go to the first step of the app. To do that you need to write in the terminal following commands:
git clone -b step1 https://github.com/merixstudio/TriviaGameNativescript.git
cd TriviaGameNativescript
npm install
As you can see, the catalog and file structure look exactly the same as in the web app development with Angular. This is why I mentioned NativeScript has a shallow learning curve - it has a lot in common with its web counterparts.
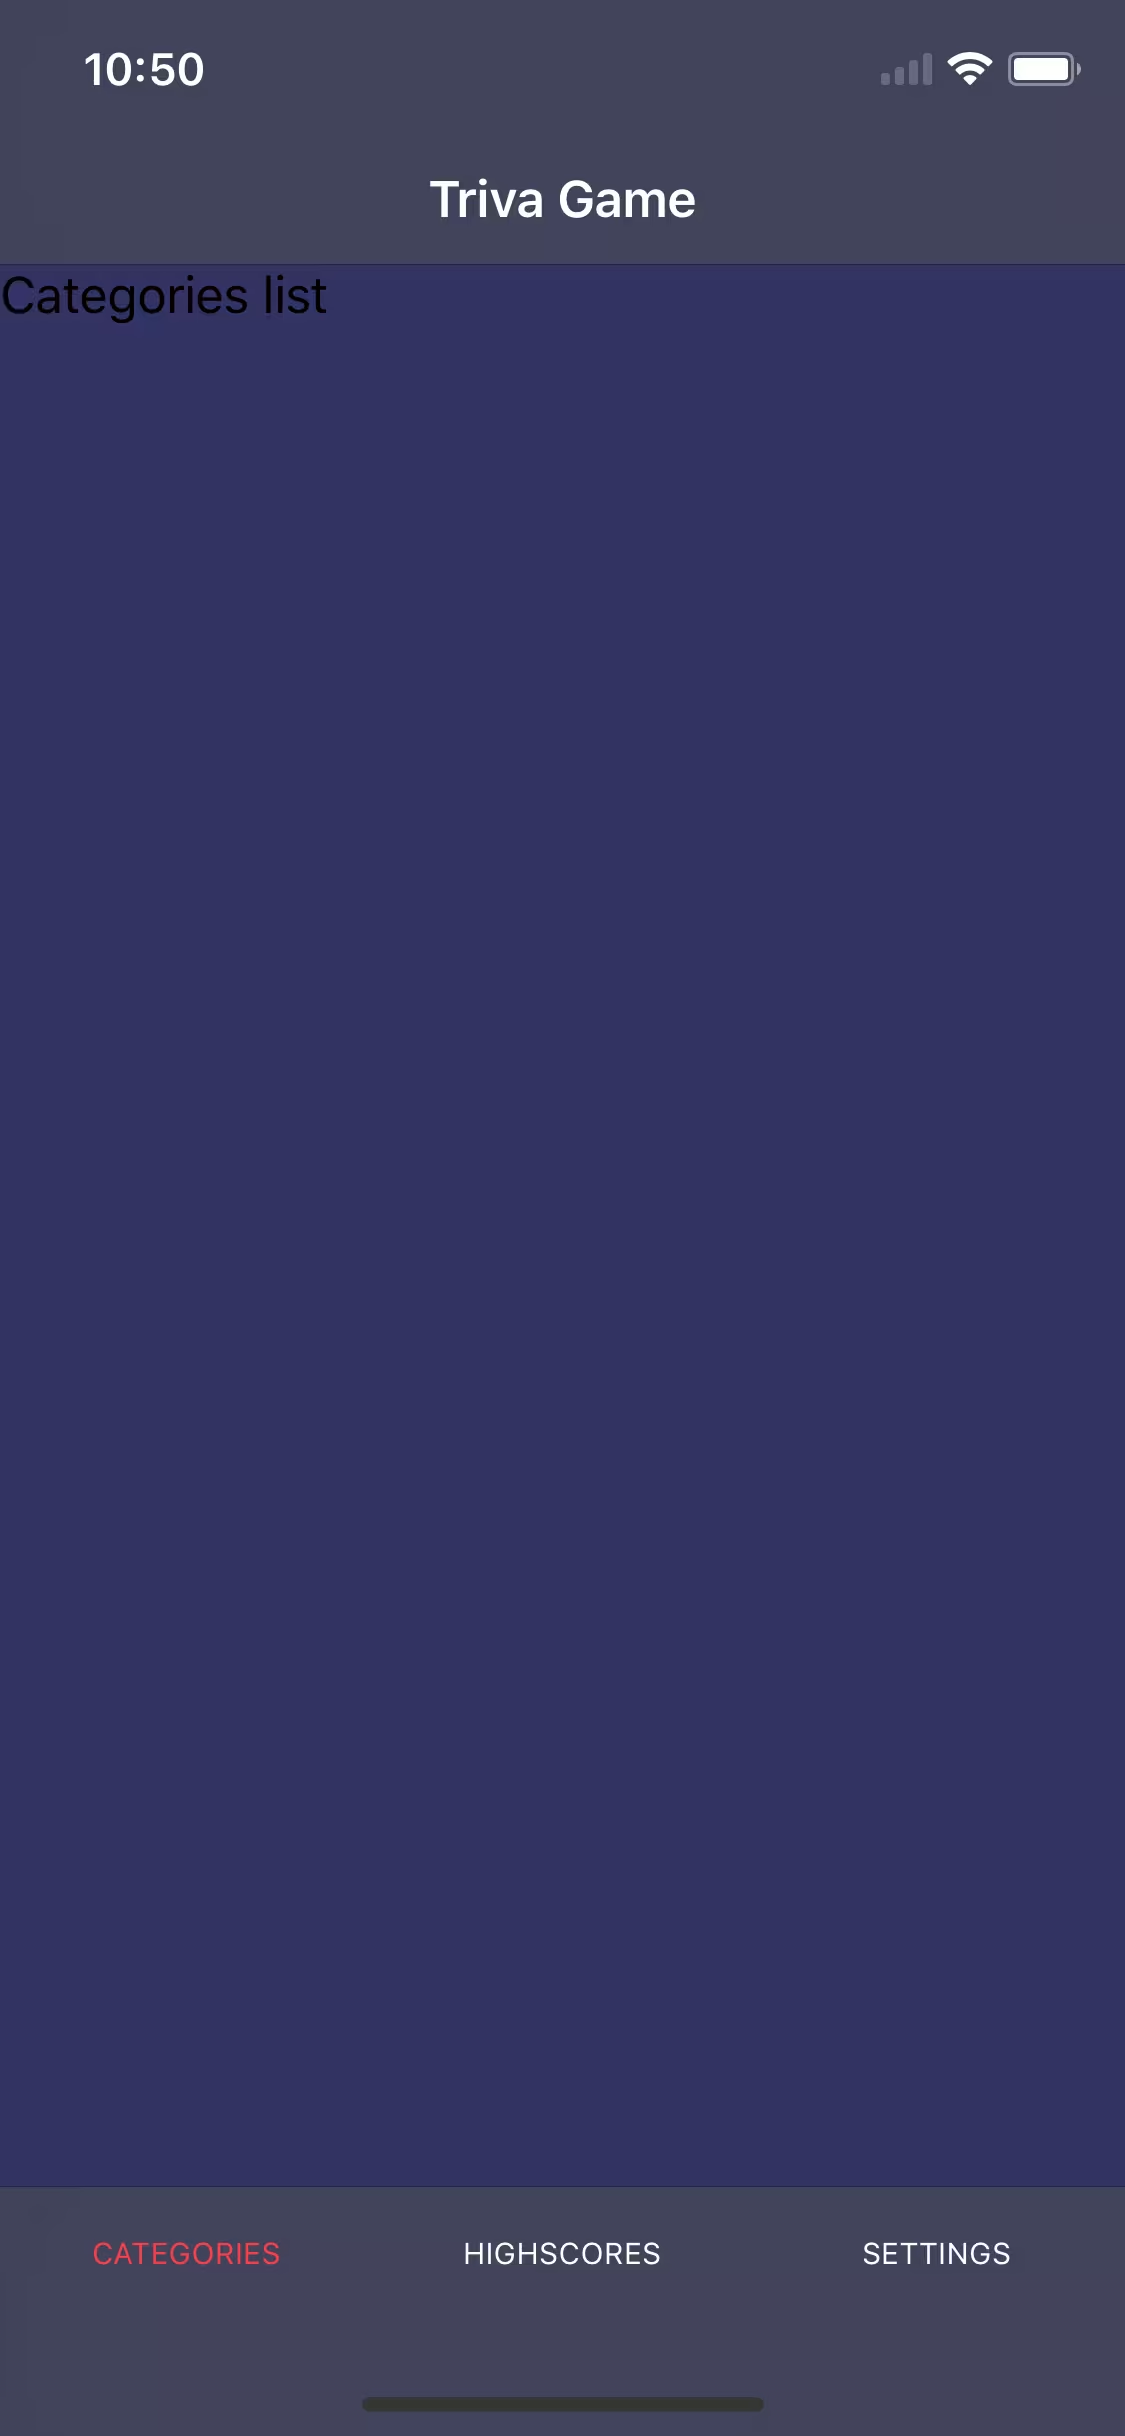
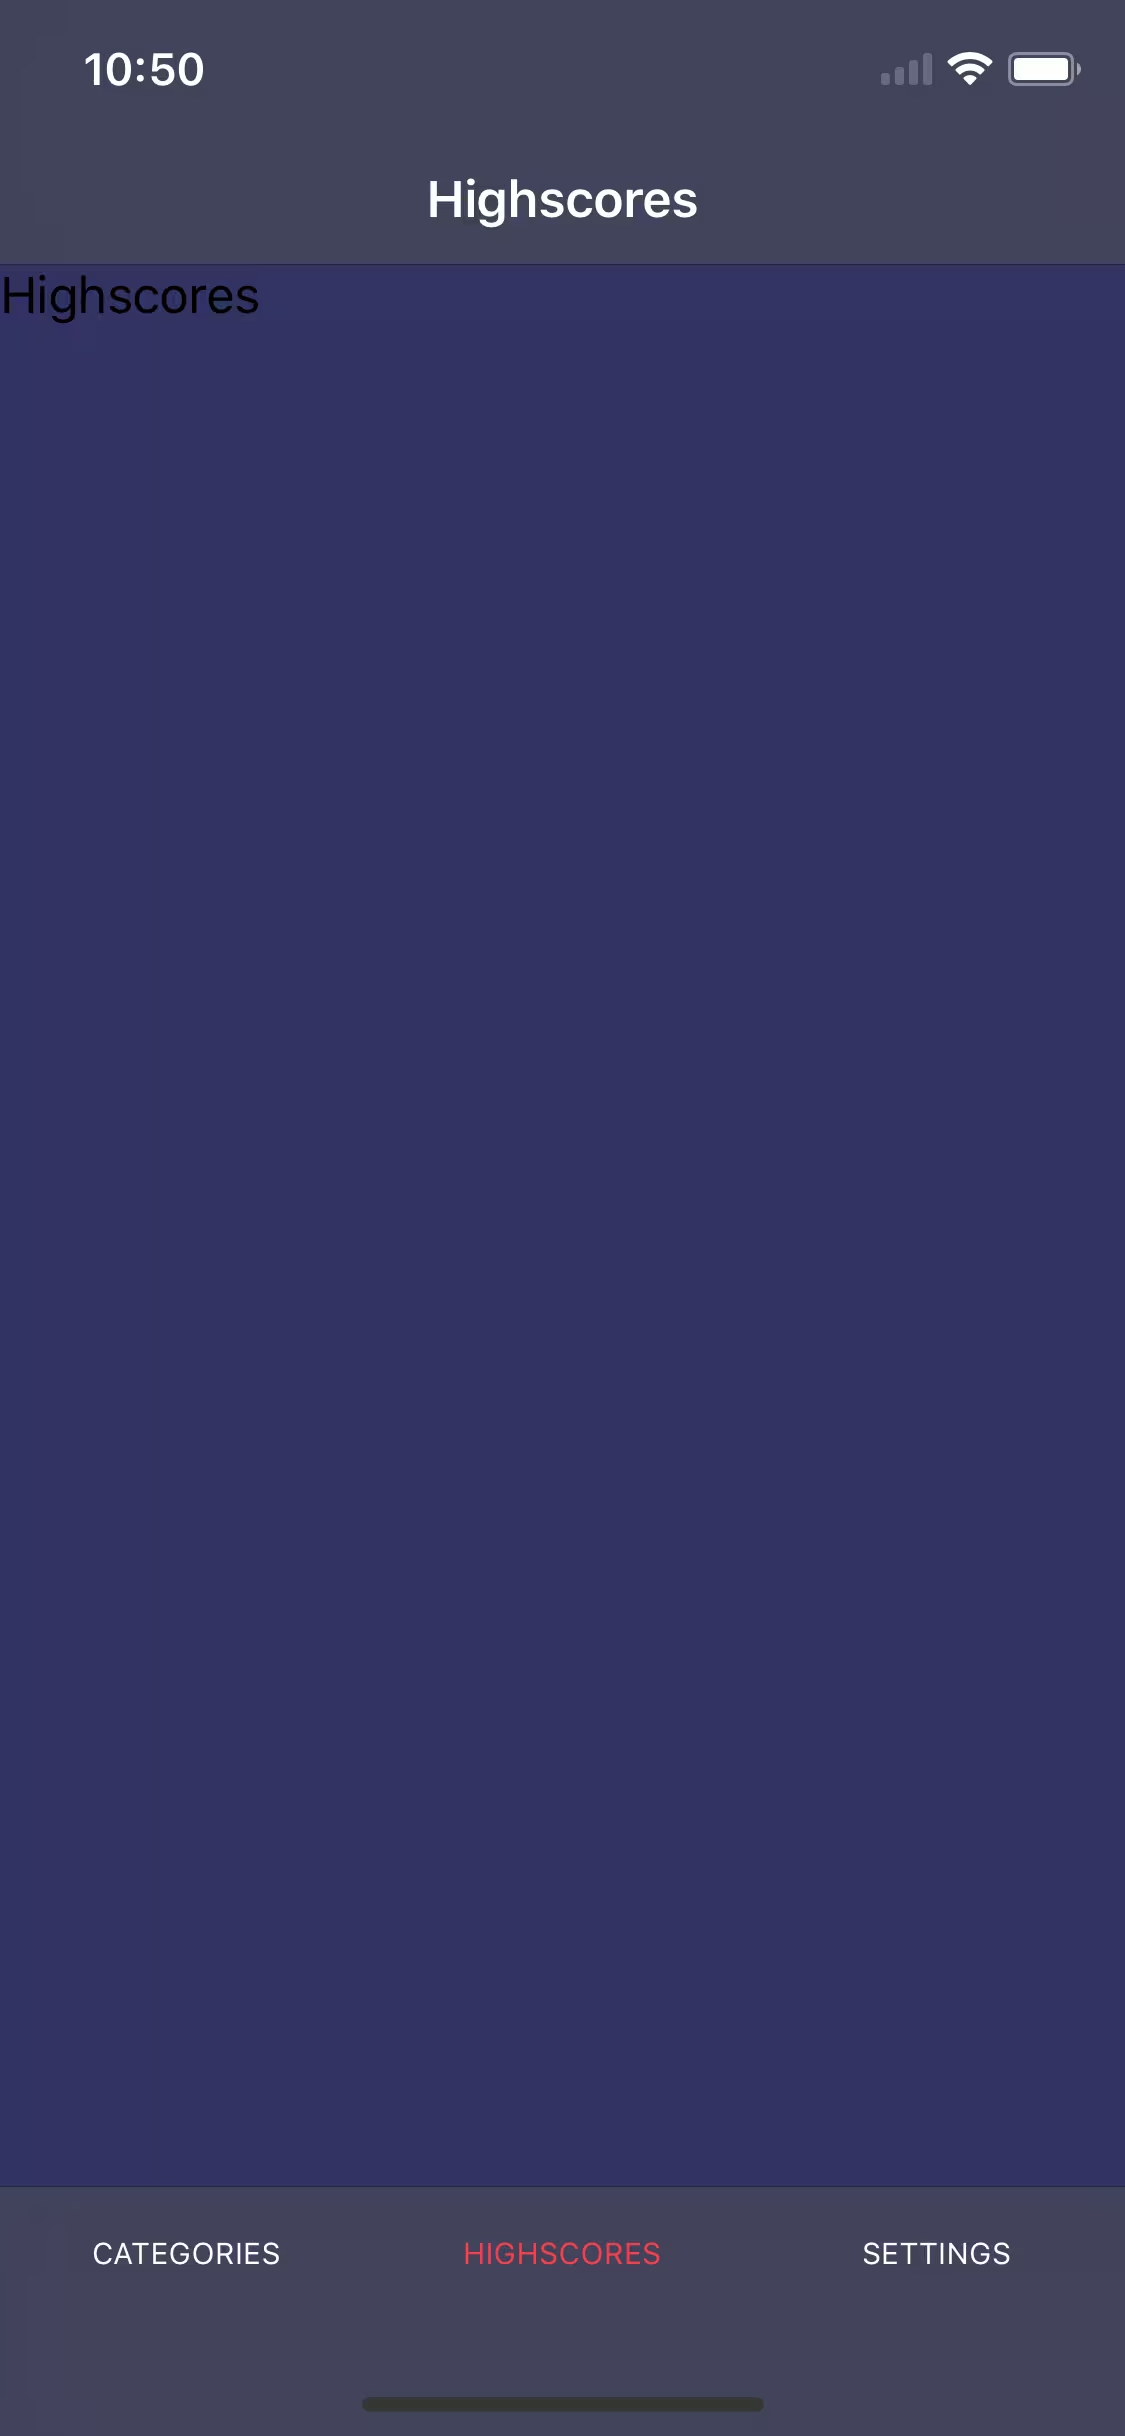
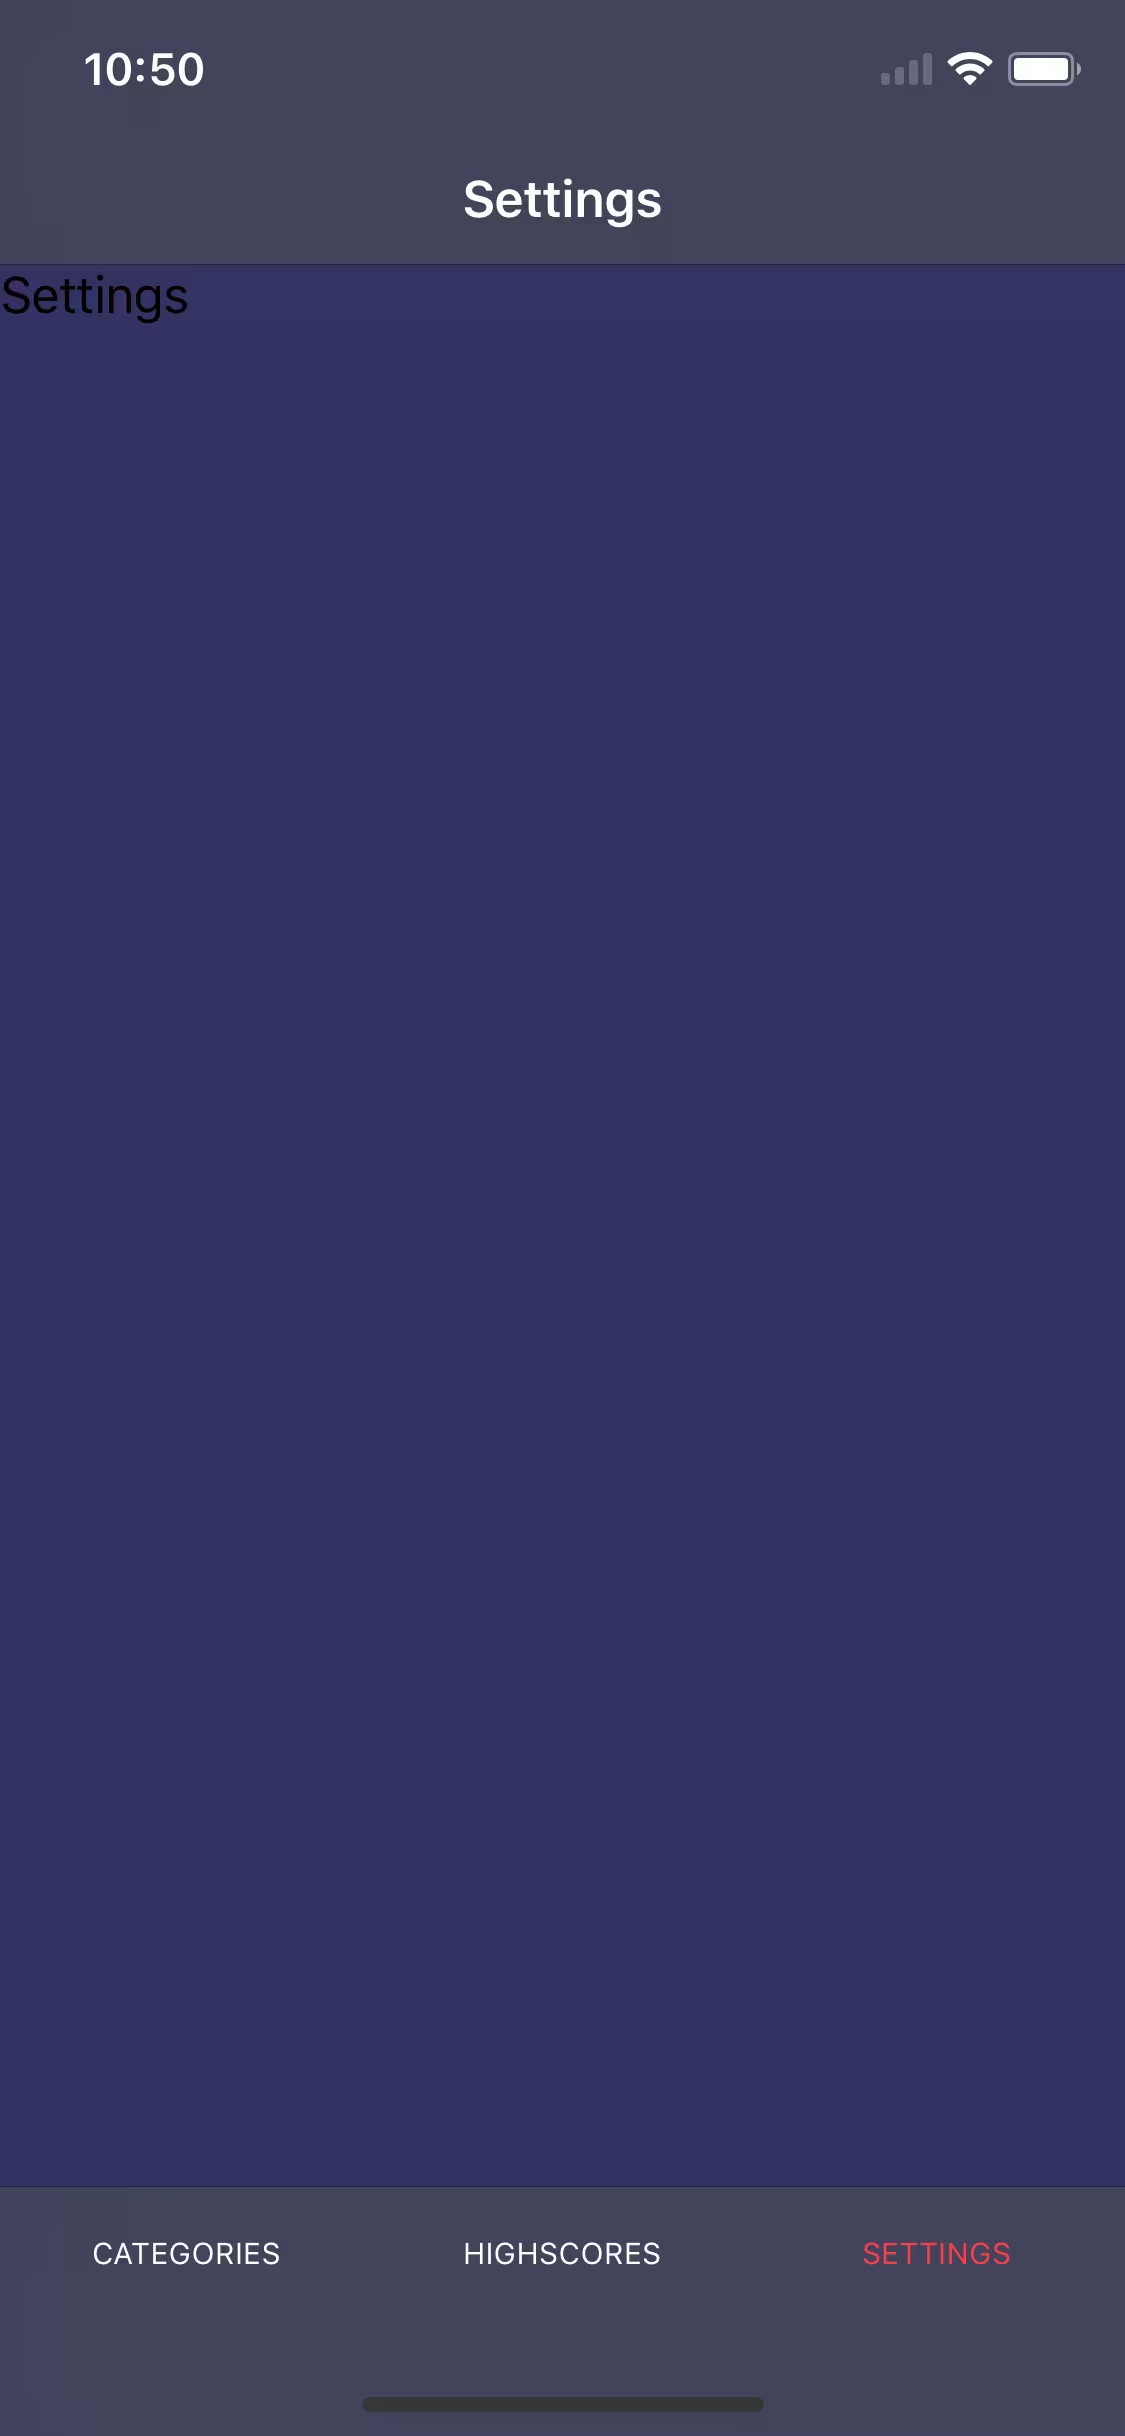
At this moment we will focus only on src/app catalog as it’s where we will write the whole app and its basic files such as main component (app.component.ts, app.component.html), module (app.module.ts) and routing (app-routing.module.ts) are located. Additionally, we’ve got module catalog, in which we will divide our app into particular sections. As you probably noticed there are already some sections created there and they are empty screens: Categories, Highscores, and Settings divided into tabs. I’ve had to prepare them in advance so we can save some time but if you’re interested in how to create them - there is an article showing the process it the official NativeScript blog.
I’ve just followed the description published there and omitted this piece.
Here’s what I’ve done in our repository:
1. I created a new app in Nativescript CLI.
tns create TriviaGameNativescript --ng --appid tg
2. I changed the configuration files
tslint.json
.editorconfig
.gitignore
3. I created 3 new modules and containers for equivalent categories in tabs.
ng generate module ./module/categories
ng generate module ./module/highscores
ng generate module ./module/settings

ng generate component ./module/categories/containers/categories-list --module ./module/categories
ng generate component ./module/highscores/containers/highscores-list --module ./module/highscores
ng generate component ./module/settings/containers/settings --module ./module/settings
4. I created separate routing for every each module and added them to the main routing (app-routing.module.ts).
5. I implemented tabs following the article on NativeScript blog.
Time to run our NativeScript mobile app
If you’ve done everything I mentioned this far we can now run our mobile app in the initial stage. To do that you need to write in the terminal these commands:
tns run ios -—bundle --emulator
or
tns run android —-bundle --emulator
(depending on the device you want to run the app with).
It may take some time to build the mobile app on the emulator for the first time but fortunately, every next time you’ll be doing it faster. When the app is built, the emulator should activate with our app. In case it didn’t and some error still show up, the first thing you need to do is to write the command:
tns doctor
in the terminal. It will analyze if your computer has everything which is required by NativeScript installed. If not - it will advise what to do to fix it. In case of errors still, appear you can try to find it on StackOverflow or describe it in the comment under the article.
NativeScript Widgets
We will build the whole app using so-called widgets - the collections of Angular components in NativeScript and implementations equivalent to the native widgets for iOS and Android. It means that if you want to screen text then you will use Label component, which after compiling to native code will utilize UILabel in iOS case and android.widget.TextView on Android. You can check which native widget is used by a particular component at the bottom of documentation of every each NativeScript component. Our whole app will be based on widgets so additionally I will try to describe them when they will be used for the first time in this tutorial.
Marketplace
Sometimes you won’t find the widget you need or you’ll have to write something more complicated that uses native API of the phone. To set an example - if you would like to write an app which utilizes Camera API then Nativescript Marketplace might help a lot. It’s a collection of plugins, patterns or even ready-made sample apps for NativeScript. Using the marketplace is really easy - you have to write one command in the terminal:
tns plugin add [pluginName]
Of course, we can also install additional JavaScript libraries through npm or yarn.
That’s it for now. As you probably noticed we didn’t write a single code but we needed some theoretical background and configuration for the start. You can be more than sure coding will appear in the next part of the article and there will be quite a lot of it as we will:
- create a category button,
- show the category list on the main screen
- build the game module,
- add animations for the button.
Feel excited?
Here's PART 2 of building NativeScript app guide.
Want to create apps in cross-platform frameworks with our devs? Check our job offers and join Merixstudio team!
In the first part of my article series, I introduced you the NativeScript CLI installation and running the mobile app in the initial stage. Here, in the second part, we will focus on:
- creating the category button;
- displaying the category list on the home screen;
- creating the game module;
- animating the button.
In our app, we are going to use the public API to get a pool of questions from a given category.
Each category has its unique ID, which we will pass as query params in the GET request to API. Therefore, at the very beginning, we will create an enum file in which the ID will be stored for the categories we have selected. To create an enum file in the appropriate directory, use the Angular CLI, enter the following command to the terminal.
ng generate enum ./module/core/entity/category/category-type
/src/app/module/core/entity/category/category-type.enum.ts
export enum CategoryType {
 BOOKS = 10,
 FILM = 11,
 MUSIC = 12,
 VIDEO_GAMES = 15,
 SPORTS = 21,
 GEOGRAPHY = 22,
 HISTORY = 23,
 POLITICS = 24,
 ART = 25,
 ANIMALS = 27,
}
Hint: In Angular, a good practice is to store interfaces and enum files in the core module.
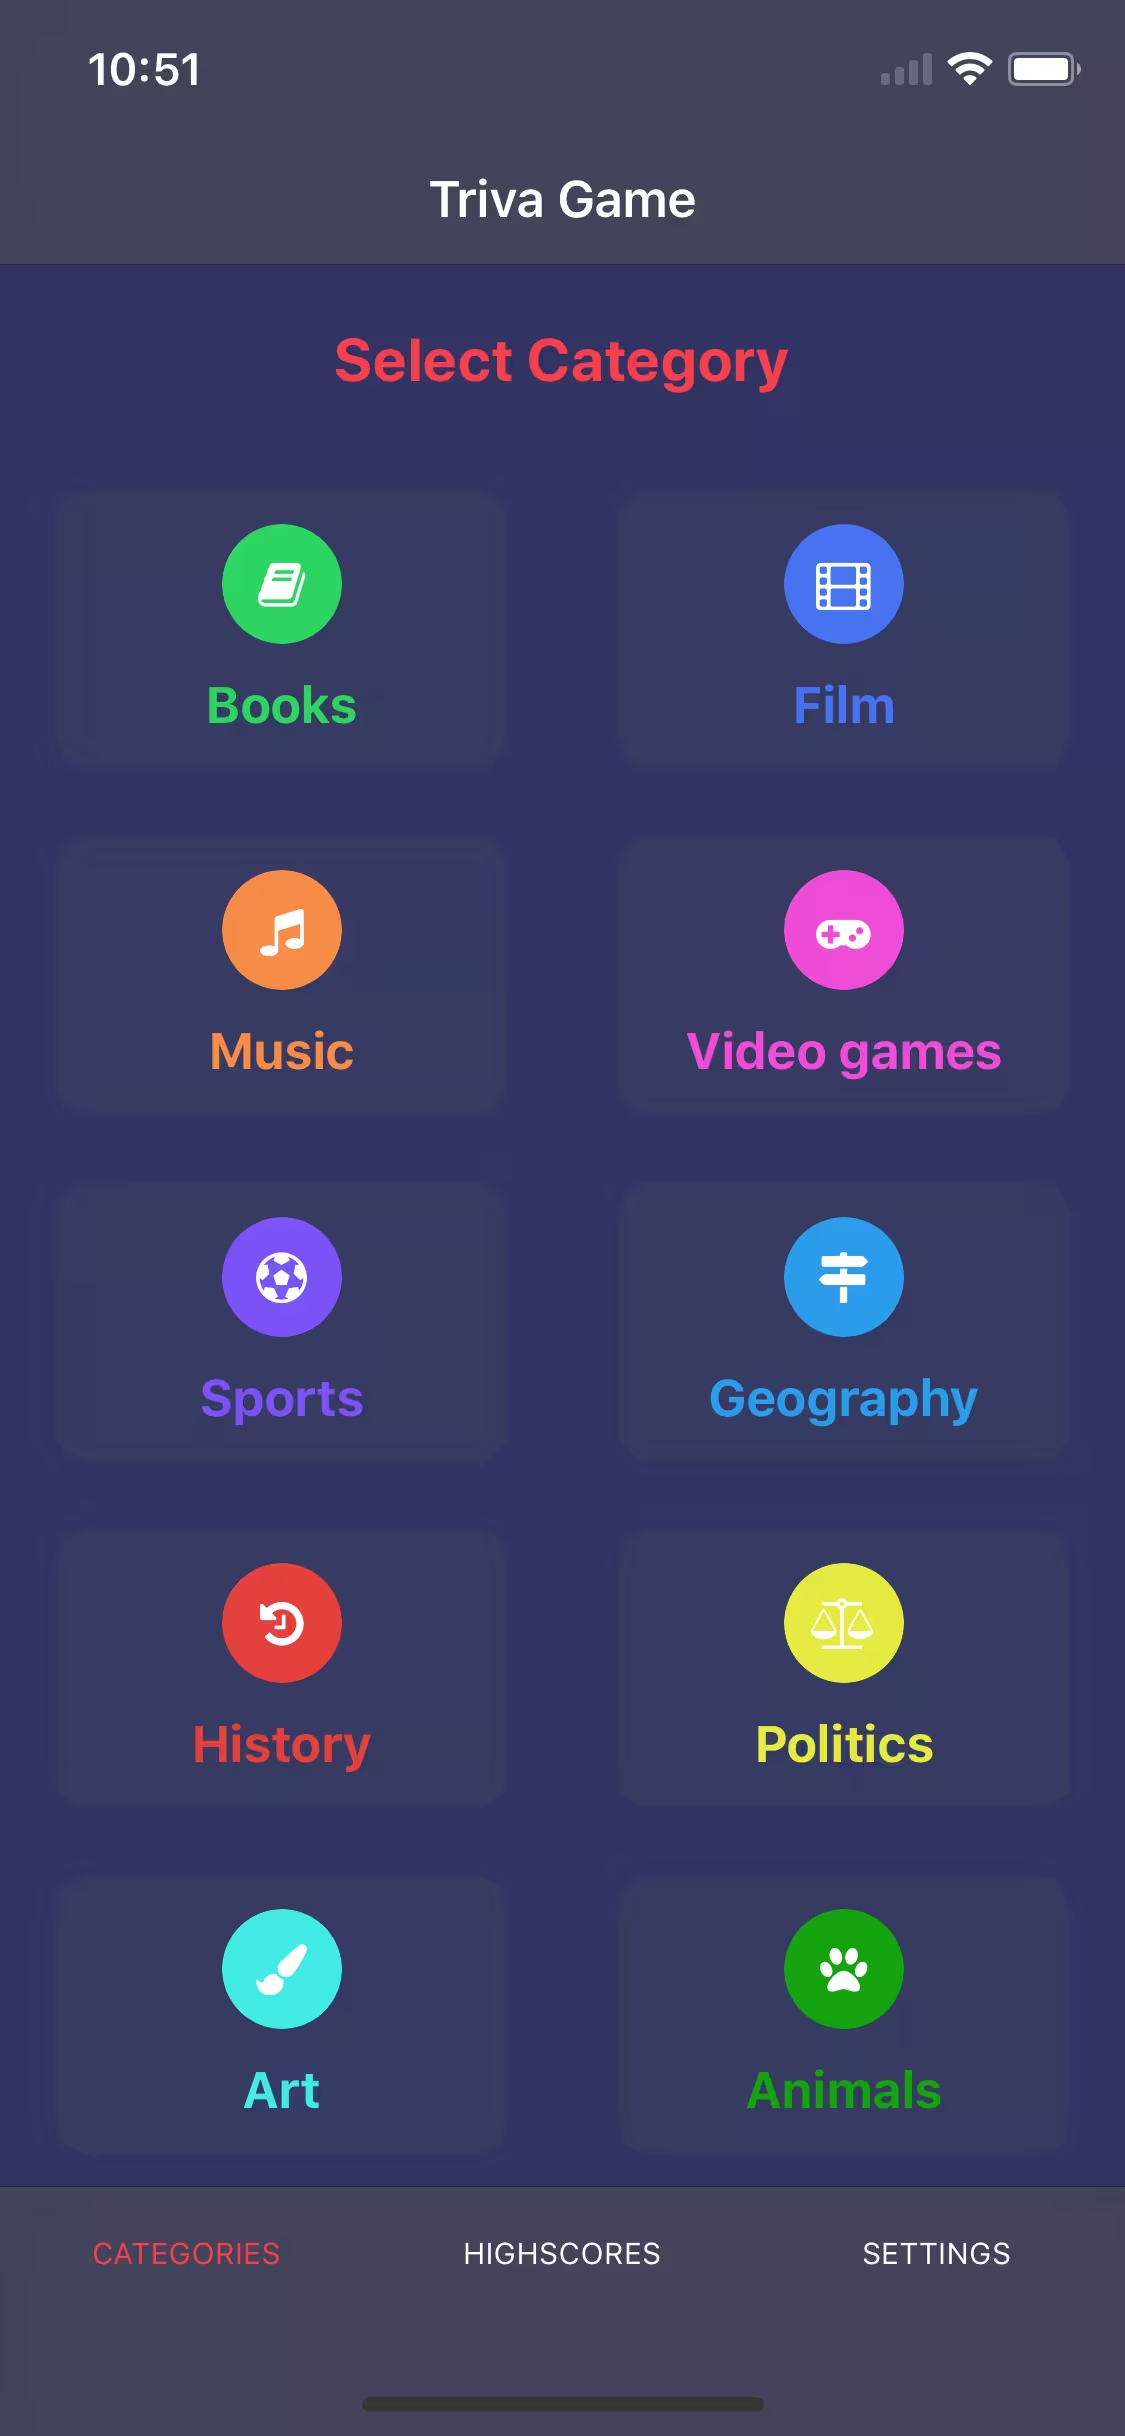
Creating the category button
Now we can fill the space on the home screen. For this, we are going to create a category button component and then use it to display all categories on a special type of template, which is GridLayout. To make this task easier, we will use Angular CLI to generate a new component:
ng generate component ./module/categories/components/category-button --module ./module/categories
Note: In this project, we are using NativeScript 5.x that supports two different ways for building applications - the bundle workflow and the legacy workflow. Unfortunately, this forces us to manually add the "moduleId" property to each newly generated component.
@Component({
 selector: 'tg-category-button',
 templateUrl: './category-button.component.html',
 styleUrls: ['./category-button.component.css'],
 moduleId: module.id, // <-- HERE
})@NgModule({
 schemas: [NO_ERRORS_SCHEMA],
 imports: [
 NativeScriptCommonModule,
 NativeScriptRouterModule,
 CategoriesRoutingModule,
 ],
 declarations: [
 CategoriesListComponent,
 CategoryButtonComponent, // <-- HERE
 ],
})
export class CategoriesModule { }
The tg-category-button component will take several properties:
- text - category name;
- icon - icon unicode from FontAwesome package
- color - button color;
- row - row in which you want to display the button in GridLayout
- col - column in which you want to display the button in GridLayout
- categoryId - unique category ID.
NativeScript templates
Nativescript, unlike React-Native, has several types of templates on which we can display application content. We can distinguish such templates as:
- AbsoluteLayout;
- DockLayout;
- GridLayout;
- StackLayout;
- WrapLayout,
- FlexboxLayout.
I won’t describe each of them in detail here, because that's what documentation is for. I assume that you can probably guess what most of them work just by reading its name. In this part of the article, I will focus only on GridLayout, because we are going to use it to display category buttons.
GridLayout allows you to define your own grid, on which we can arrange components in a very convenient way. In addition, it allows you to solve the problem related to the app resolution on different devices. Thanks to this, our grid will be flexible and the elements displayed will adapt to it. Read here how to use it. The code of our component looks like this:
src/app/module/categories/components/category-button/category-button.component.ts
import { Component, Input, OnInit } from '@angular/core';
import { GestureEventData } from 'tns-core-modules/ui/gestures';

@Component({
 selector: 'tg-category-button',
 templateUrl: './category-button.component.html',
 styleUrls: ['./category-button.component.css'],
 moduleId: module.id, // AD.1
})
export class CategoryButtonComponent implements OnInit {
 // AD.2
 @Input() text: string;
 @Input() icon: string;
 @Input() color: string;
 @Input() row: string;
 @Input() col: string;
 @Input() categoryId: string;

 constructor() { }

 ngOnInit() {
 }

 // AD.3
 handleTap(args: GestureEventData) {
 console.log('Navigate to game, category id: ', this.categoryId);
 }
}
src/app/module/categories/components/category-button/category-button.component.html
<StackLayout [row]="row" [col]="col"> <!-- AD.4 -->
 <StackLayout
 class="button-container"
 (tap)="handleTap($event)" <!-- AD.5 -->
 >
 <StackLayout
 class="icon-circle"
 [backgroundColor]="color"
 >
 <!-- AD.6 -->
 <Label
 [text]="icon"
 class="far icon"
 ></Label>
 </StackLayout>
 <Label
 class="title"
 [text]="text"
 [color]="color"
 ></Label>
 </StackLayout>
</StackLayout>
- AD 1 - once again I point out the fact that every component in NativeScript must have the moduleId parameter in the component decorator;
- AD. 2 - declaration of parameters that the component takes;
- AD. 3 - an additional method that will capture the tap event and then redirect to the game;
- AD.4 - StackLayout is the simplest type of template that displays each element under itself by default. In addition, we pass in the parameters row and col, which will determine the position on the grid of the GridLayout;
- AD.5 - link the tap event to the StackLayout element and its children.
- AD.6 - Label is one of the widgets provided by NativeScript. This is the basic component for displaying text in the application because NativeScript does not allow displaying the text itself.
Once we've created the category-button component, we can display the categories of our game on the grid:
src/app/module/categories/containers/categories-list/categories-list.component.ts
import { Component, OnInit } from '@angular/core';
import { CategoryType } from '~/app/module/core/entity/category/category-type';

@Component({
 selector: 'tg-categories-list',
 templateUrl: './categories-list.component.html',
 styleUrls: ['./categories-list.component.css'],
 moduleId: module.id,
})
export class CategoriesListComponent implements OnInit {
 private categoryType = CategoryType; // AD.1

 constructor() { }

 ngOnInit() { }

}
src/app/module/categories/containers/categories-list/categories-list.component.html
<StackLayout class="main">
<ActionBar title="Triva Game" class="action-bar"></ActionBar> <!-- AD.2 -->
<Label class="title" text="Select Category"></Label>
<!-- AD.3 -->
<GridLayout
columns="*, *"
rows="*, *, *, *, *"
>
<!-- AD.4 -->
<tg-category-button
icon=""
color="#2ed462"
row="0"
col="0"
text="Books"
[categoryId]="categoryType.BOOKS"
></tg-category-button>
<tg-category-button
icon=""
color="#4872f1"
row="0"
col="1"
text="Film"
[categoryId]="categoryType.FILM"
></tg-category-button>
<tg-category-button
icon=""
color="#f78b49"
row="1"
col="0"
text="Music"
[categoryId]="categoryType.MUSIC"
></tg-category-button>
<tg-category-button
icon=""
color="#ef4cd8"
row="1"
col="1"
text="Video games"
[categoryId]="categoryType.VIDEO_GAMES"
></tg-category-button>
<tg-category-button
icon=""
color="#7c52f6"
row="2"
col="0"
text="Sports"
[categoryId]="categoryType.SPORTS"
></tg-category-button>
<tg-category-button
icon=""
color="#2c9beb"
row="2"
col="1"
text="Geography"
[categoryId]="categoryType.GEOGRAPHY"
></tg-category-button>
<tg-category-button
icon=""
color="#e4403d"
row="3"
col="0"
text="History"
[categoryId]="categoryType.HISTORY"
></tg-category-button>
<tg-category-button
icon=""
color="#e5ea42"
row="3"
col="1"
text="Politics"
[categoryId]="categoryType.POLITICS"
></tg-category-button>
<tg-category-button
icon=""
color="#42eae5"
row="4"
col="0"
text="Art"
[categoryId]="categoryType.ART"
></tg-category-button>
<tg-category-button
icon=""
color="#16a210"
row="4"
col="1"
text="Animals"
[categoryId]="categoryType.ANIMALS"
></tg-category-button>
</GridLayout>
</StackLayout>
- AD.1 - save to the private property of the enum class with categories;
- AD.2 - ActionBar is another widget (component) provided by NativeScript. It allows you to add the top header, in which you can display the title for a given section and return buttons to the previous screen;
- AD.3 - here we define our grid, which will consist of 2 columns with the maximum available width and 5 rows with the maximum available height;
- AD.4 - we use the previously created tg-category-button component, to which we pass the icon in the form of a unicode and positions, using the column number and row. Another important parameter is categoryId, in which we pass the category id from our enum file.
At this point, we’ve already finished the main logic of the category view. The project still lacks the visual side, but we will deal with that later. In the next step, we will focus on is to create an initial view of the game - we will create a new module and container for this purpose.
ng generate module ./module/gameng generate component ./module/game/containers/start-screen --module ./module/game
Note: In this project, we are using NativeScript 5.x that supports two different ways for building applications - the bundle workflow and the legacy workflow. Unfortunately, this forces us to manually add the "moduleId" property to each newly generated component.
To make our new module complete, we need to create a separate routing for it.
src/app/module/game/game-routing.module.ts
import { NgModule } from '@angular/core';
import { Routes } from '@angular/router';
import { NativeScriptRouterModule } from 'nativescript-angular/router';
import { StartScreenComponent } from '~/app/module/game/containers/start-screen/start-screen.component';

export const routes: Routes = [
 {
 path: '',
 component: StartScreenComponent,
 },
];

@NgModule({
 imports: [NativeScriptRouterModule.forChild(routes)],
 exports: [NativeScriptRouterModule]
})
export class GameRoutingModule { }
and attach this module to the main routing:
src/app/app-routing.module.ts
import { NgModule } from '@angular/core';
import { NativeScriptRouterModule } from 'nativescript-angular/router';
import { Routes } from '@angular/router';

const routes: Routes = [
 {
 path: '',
 redirectTo: '/tabs/default',
 pathMatch: 'full'
 },
 {
 path: 'tabs',
 loadChildren: () => import('~/app/module/tabs/tabs.module').then(m => m.TabsModule),
 },
 { // HERE
 path: 'game',
 loadChildren: () => import('~/app/module/game/game.module').then(m => m.GameModule),
 },
];

@NgModule({
 imports: [NativeScriptRouterModule.forRoot(routes)],
 exports: [NativeScriptRouterModule]
})
export class AppRoutingModule { }
Creating an animation
The last thing we do in this part is to redirect to the given category after tapping on the screen. We need to go back to category-button-component.ts and complete the handleTap method. In addition, we will create a simple animation, which after tapping on the button, will expand and after a while return to its original size.
Creating animations in NativeScript is very simple and fun, just call the animate method on the element reference you want to animate. Each animation is an asynchronous operation, so you can create a promise on them that will allow you to execute some piece of code after the animation is finished or to call another animation, which we will do in our case.
/src/app/module/categories/components/category-button/category-button.component.ts
import { Component, Input, OnInit } from '@angular/core';
import { GestureEventData } from 'tns-core-modules/ui/gestures';
import { RouterExtensions } from 'nativescript-angular';
import { NavigationExtras } from '@angular/router';

@Component({
 selector: 'tg-category-button',
 templateUrl: './category-button.component.html',
 styleUrls: ['./category-button.component.css'],
 moduleId: module.id,
})
export class CategoryButtonComponent implements OnInit {
 @Input() text: string;
 @Input() icon: string;
 @Input() color: string;
 @Input() row: string;
 @Input() col: string;
 @Input() categoryId: string;

 constructor(
 private routerExtensions: RouterExtensions // AD.1
 ) { }

 ngOnInit() {
 }

 handleTap(args: GestureEventData) {
 const view = args.view; // AD.2
 view.animate({
 // AD.3
 scale: { x: 1.3, y: 1.3 },
 duration: 100,
 })
 .then(() => view.animate({
 // AD.4
 scale: { x: 1, y: 1 },
 duration: 100,
 }))
 .then(() => {
 // AD.5
 const navigationExtras: NavigationExtras = {
 queryParams: {
 categoryId: this.categoryId,
 }
 };
 this.routerExtensions.navigate( ['game'], navigationExtras);
 })
 }
}
- AD.1 - inject RouterExtensions, which is a NativeScript implementation of the Router service from the web version of Angular. Thanks to this we can navigate the mobile application in exactly the same way as in the web version;
- AD.2 - the args.view parameter returns references to the element being tapped;
- AD.3 - the first animation - scaling the button on both planes;
- AD.4 - the second animation - rescaling the button to its original size;
- AD.5 - after the second animation is finished, we redirect to the game path along with the categoryId parameter.
What are the next steps?
Well, that’s all for today. However, before you move on to the next part, you need to fill in the missing CSS files so that the application looks like on the pictures in the first article. You can do it in two different ways:
- You can complete the missing CSS files by copying their contents from our repository, or
- or switch to another branch in the repository and then download the changes.
git checkout step2git pull origin step2
Remember to analyze the files that have changed.
In the next part we will focus on:
- the view allowing you to choose the difficulty level of the game;
- downloading a set of questions to the selected category;
- displaying the downloaded questions;
- saving the answers given.
Here's PART 3 of building NativeScript app guide.
Want to create apps in cross-platform frameworks with our devs? Check our job offers and join Merixstudio team!
If you feel you need to look at the previous parts again, feel free to do it before taking up this part:
This article forms the third part of my series. Here we are going to focus on:
- view allowing you to choose the difficulty level of the game;
- getting a set of questions to the selected category;
- displaying of downloaded questions;
- saving the answers.
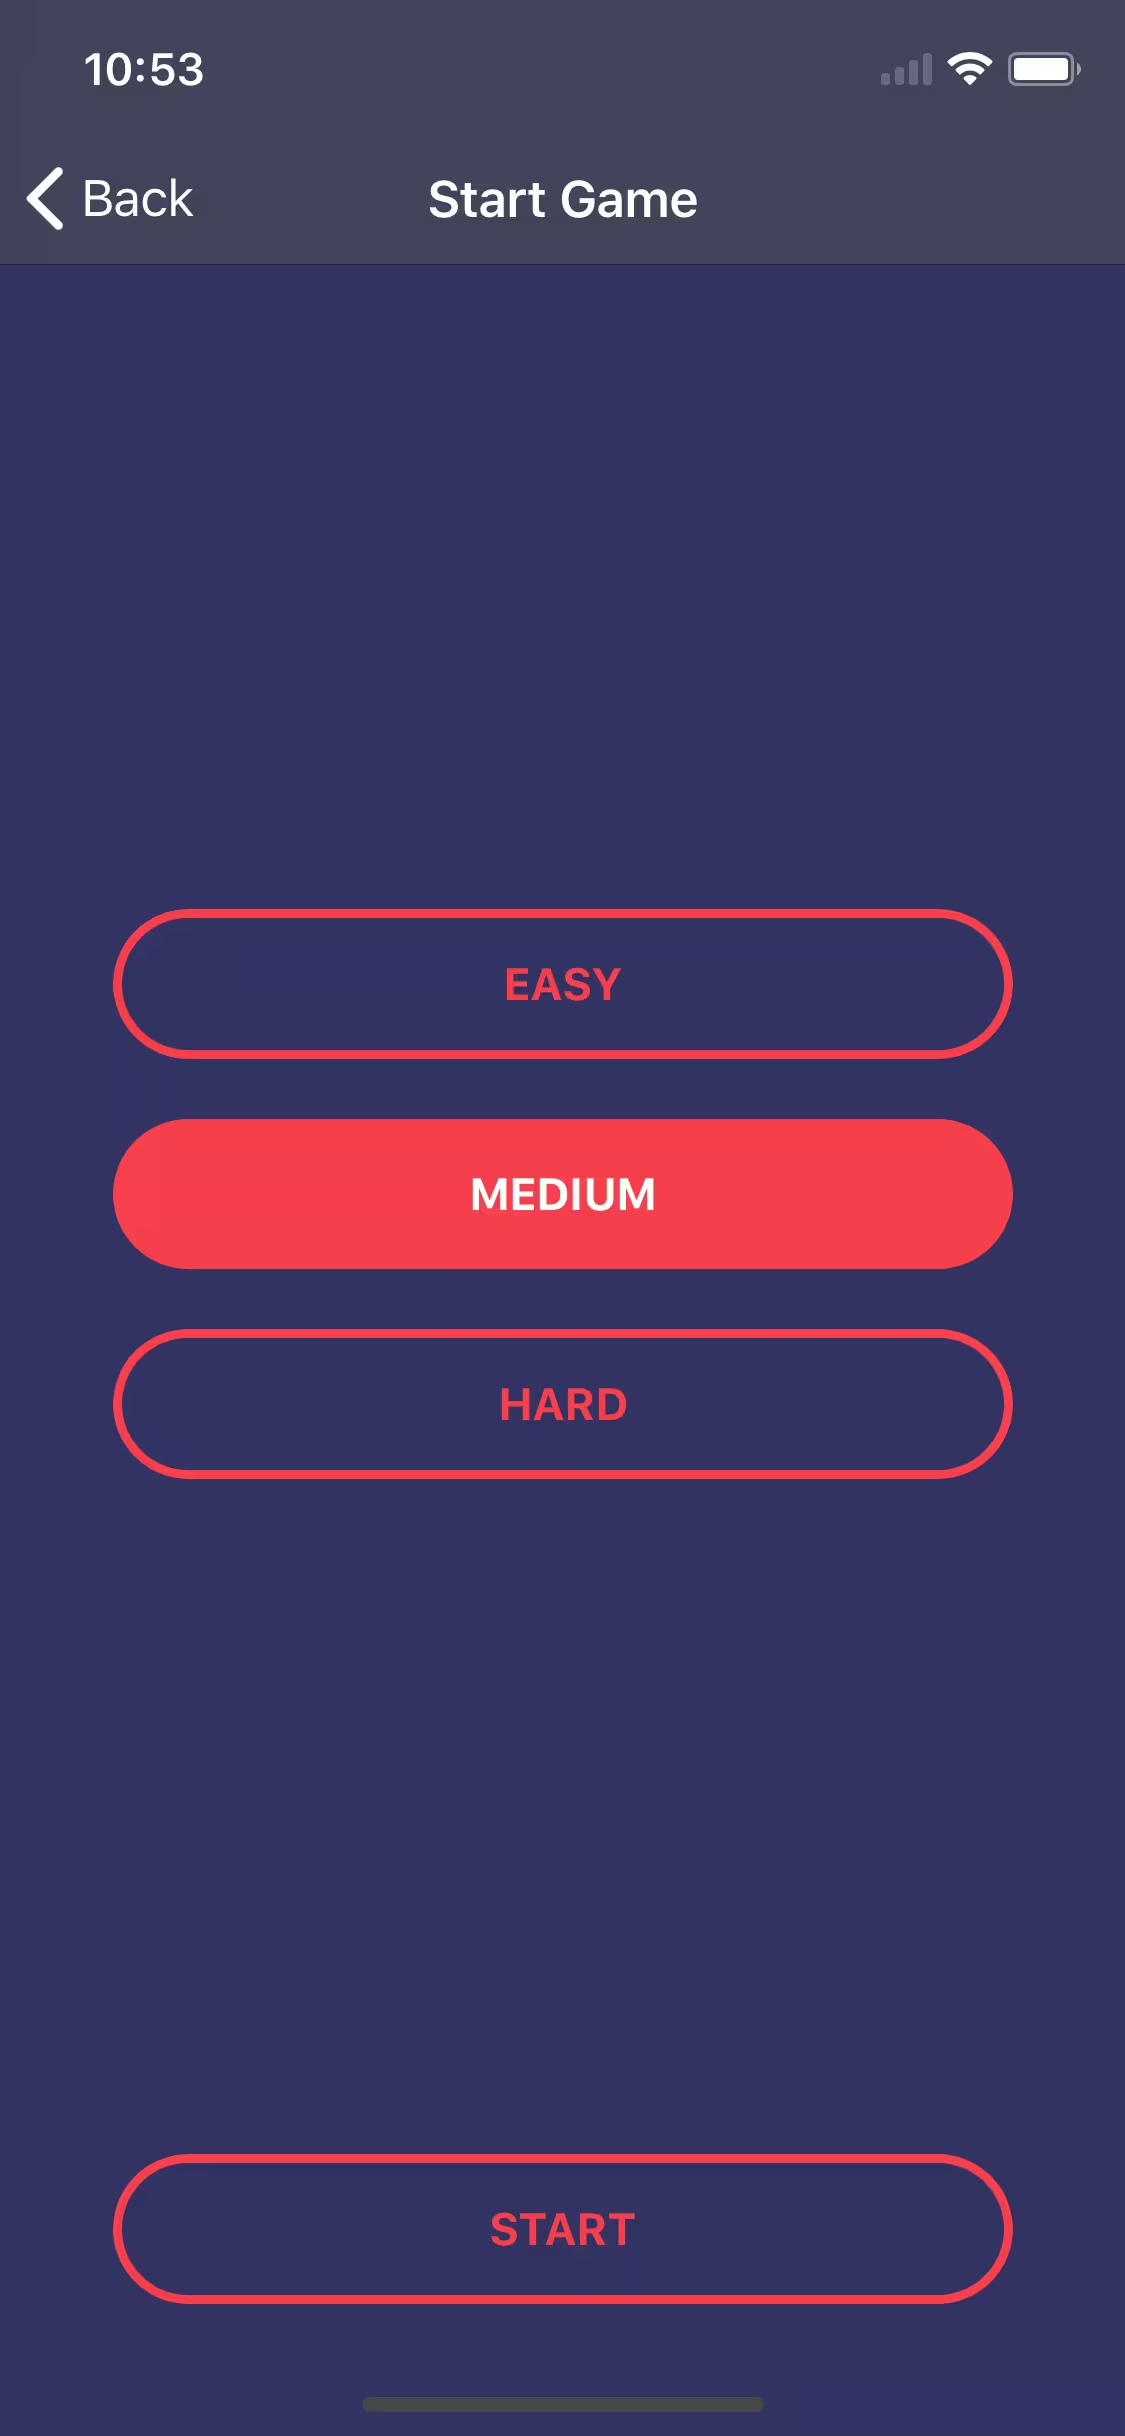
Choosing difficulty levels
So, we start immediately from generating a new enum file and filling it with the difficulty levels from the API.
ng generate enum ./module/core/entity/difficulty/difficulty-type
src/app/module/core/entity/difficulty/difficulty-type.enum.ts
export enum DifficultyType {
 EASY = 'easy',
 MEDIUM = 'medium',
 HARD = 'hard',
}
Then we return to the start-screen container created in the previous article
src/app/module/game/containers/start-screen/start-screen.component.ts
import { Component, OnInit } from '@angular/core';
import { ActivatedRoute, NavigationExtras } from '@angular/router';
import { DifficultyType } from '~/app/module/core/entity/difficulty/difficulty-type.enum';
import { RouterExtensions } from 'nativescript-angular';

@Component({
 selector: 'tg-start-screen',
 templateUrl: './start-screen.component.html',
 styleUrls: ['./start-screen.component.css'],
 moduleId: module.id,
})
export class StartScreenComponent implements OnInit {
 private difficultyType = DifficultyType; // AD.1
 private categoryId: string;
 private difficulty: string;

 constructor(
 private route: ActivatedRoute,
 private routerExtensions: RouterExtensions
 ) { }

 ngOnInit() {
 this.difficulty = this.difficultyType.MEDIUM; // AD.2

 // AD.3
 this.route.queryParams.subscribe((params) => {
 this.categoryId = params['categoryId'];
 })
 }

 // AD.4
 changeDifficulty(difficulty) {
 this.difficulty = difficulty;
 }

 // AD.5
 startGame() {
 const navigationExtras: NavigationExtras = {
 queryParams: {
 categoryId: this.categoryId,
 difficulty: this.difficulty,
 }
 };
 this.routerExtensions.navigate( ['game', 'questions'], navigationExtras);
 }
}
src/app/module/game/containers/start-screen/start-screen.component.html
<!-- AD.6 -->
<GridLayout
 class="main"
 columns="*"
 rows="*, auto, auto, auto, *, auto"
>
 <ActionBar title="Start Game" class="action-bar"></ActionBar>

 <!-- AD.7 -->
 <Button
 row="1"
 text="Easy"
 [ngClass]="{ 'selected': difficulty === difficultyType.EASY }"
 (tap)="changeDifficulty(difficultyType.EASY)"
 ></Button>
 <Button
 row="2"
 text="Medium"
 [ngClass]="{ 'selected': difficulty === difficultyType.MEDIUM }"
 (tap)="changeDifficulty(difficultyType.MEDIUM)"
 ></Button>
 <Button
 row="3"
 text="Hard"
 [ngClass]="{ 'selected': difficulty === difficultyType.HARD }"
 (tap)="changeDifficulty(difficultyType.HARD)"
 ></Button>

 <Button
 row="5"
 text="Start"
 (tap)="startGame()"
 ></Button>
</GridLayout>
- AD.1 - saves to the private property of the enum with levels of difficulty;
- AD.2 - sets the default difficulty level to medium;
- AD.3 - gets forwarded parameters that are included with the redirection. In our case, this is the categoryId;
- AD.4 - a method to change the difficulty level;
- AD.5 - a method that redirects the user to the next view (at this moment this view does not exist yet, we will create it in a minute);
- AD.6 - we use GridLayout again, set 1 column and 6 rows, the first row pushes the content up from the top and the second row from the bottom up. Thanks to this rows from 2 to 4 are centered, and the last row is going to be placed at the very bottom of the screen;
- AD.7 - we use the default Button widget, whose background changes depending on the level of difficulty selected. We also attach a method to change the level of difficulty on the tap event.
Note: Nativescript provides several gestures that we can capture. These include, among others:
- TapDouble;
- TapLong;
- Press;
- Swipe;
- Pan;
- Pinch;
- Rotation;
- Touch.
As you can see there is quite a lot of it, you can read about each of these gestures in the official documentation. In the Nativescript there is no click event known from web applications, which is why the tap event is used instead of it.
Now, we can generate a container of the game itself and service responsible for its logic.
ng generate component ./module/game/containers/questions --module ./module/game
ng generate service ./module/core/service/game/game --spec false
Let's start with the newly created service and write to it several methods that allow us running the game and, among other things, getting questions from the selected categories and the difficulty level, saving user responses and counting points.
/src/app/module/core/service/questions/game.service.ts
import { Injectable } from '@angular/core';
import { HttpClient, HttpHeaders } from '@angular/common/http';
import { Observable } from 'rxjs';

@Injectable({
 providedIn: 'root'
})
export class GameService {
 private baseUrl: string = 'https://opentdb.com/api.php?type=boolean'; // AD.1
 private answers: any[] = []; // AD.2

 constructor(
 private http: HttpClient,
 ) { }

 private createRequestHeader() {
 let headers = new HttpHeaders({
 'Content-Type': 'application/json',
 });

 return headers;
 }

 // AD.3
 getQuestions(categoryId: string, difficulty: string, questionsAmount: number): Observable<any> {
 const serverUrl = `${this.baseUrl}&category=${categoryId}&difficulty=${difficulty}&amount=${questionsAmount}`;
 const headers = this.createRequestHeader();

 return this.http.get<any>(serverUrl, { headers: headers });
 }

 // AD.4
 setAnswer(question: string, answer: boolean | string, correctAnswer: boolean): void {
 this.answers.push({
 question,
 answer,
 correctAnswer,
 });
 }

 getAnswers() {
 return this.answers;
 }

 // AD.5
 getPoints() {
 const maxPoints = this.answers.length;

 const points = this.answers.reduce((sum, el) => {
 sum += el.answer === el.correctAnswer ? 1 : 0;

 return sum;
 }, 0);

 return {
 points,
 maxPoints,
 }
 }

 // AD.6
 reset() {
 this.answers = [];
 }
}
- AD.1 - we set the basic API address, which we will modify by adding query params with difficulty level and category id;
- AD.2 - the array in which we will store the answers given by the user;
- AD.3 - a method that sends an API request using an Angular http service and retrieves a pool of questions for a given game;
- AD.4 - at the moment when the user answers the question, we will use this method to save the answer and the question;
- AD.5 - a method for counting the number of points obtained in a given game. Iterate the answer array and depending on whether the user gave the correct answer, we add a point to the sum;
- AD.6 - a method for resetting the answer array, which we will need in case the user wants to start a new game.
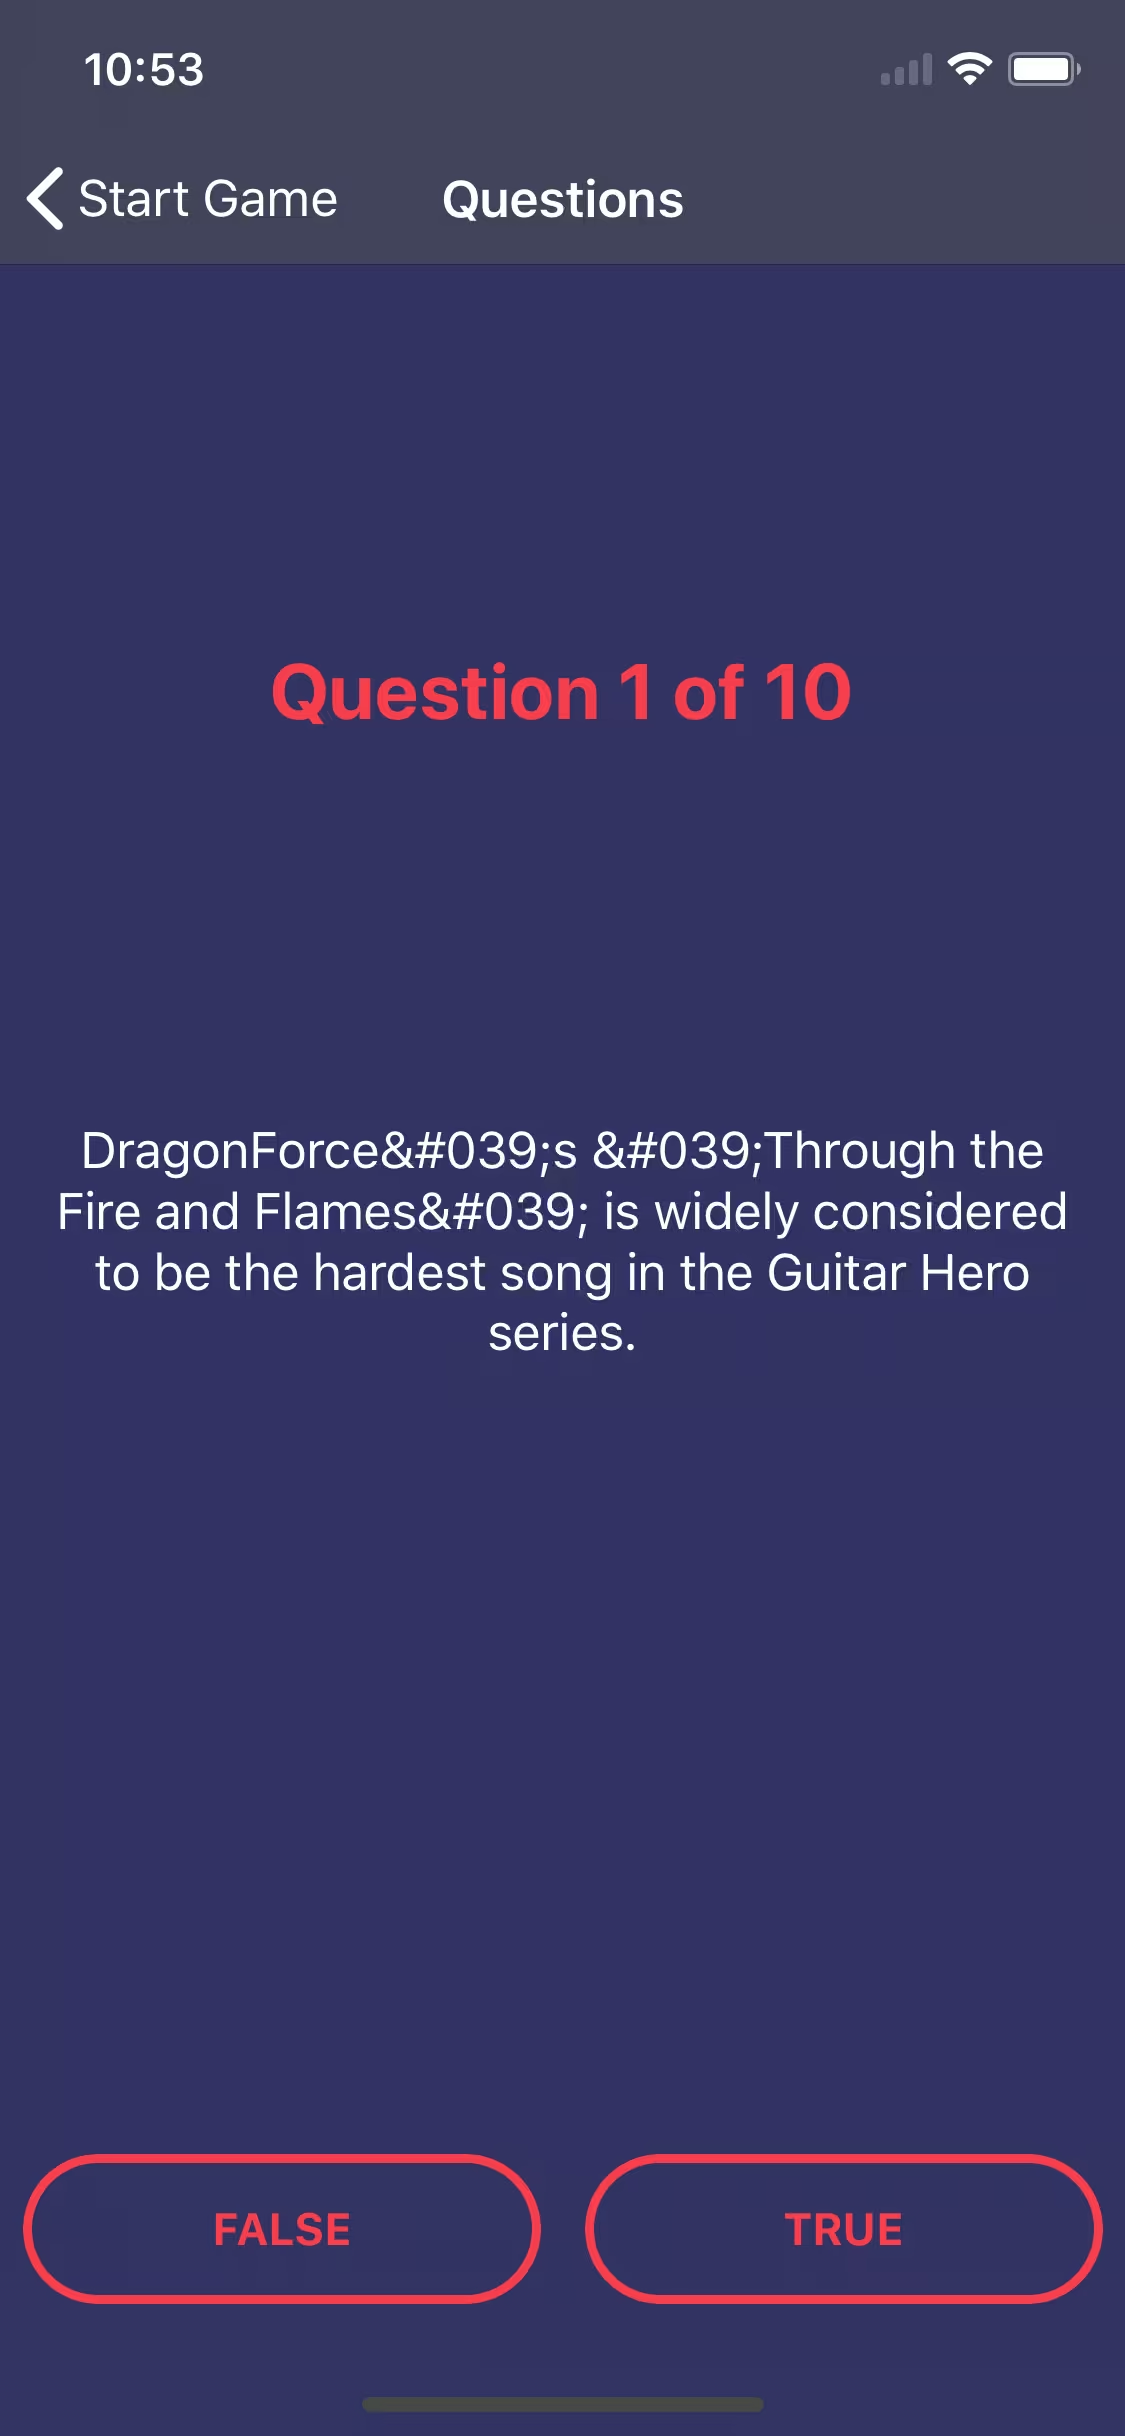
Displaying the questions
Now we will take care of displaying all questions with answer buttons.
src/app/module/game/containers/questions/questions.component.ts
import { Component, OnInit } from '@angular/core';
import { ActivatedRoute } from '@angular/router';
import { EventData } from 'tns-core-modules/data/observable';
import { RouterExtensions } from 'nativescript-angular';
import { GameService } from '~/app/module/core/service/game/game.service';

@Component({
 selector: 'tg-questions',
 templateUrl: './questions.component.html',
 styleUrls: ['./questions.component.css'],
 moduleId: module.id,
})
export class QuestionsComponent implements OnInit {
 private categoryId: string;
 private difficulty: string;
 private questions: any[];
 private currentQuestion: any;
 private currentQuestionIndex: number;
 private questionsAmount: number;
 private isLoading: boolean;

 constructor(
 private route: ActivatedRoute,
 private routerExtensions: RouterExtensions,
 private gameService: GameService, // AD.1
 ) { }

 ngOnInit() {
 this.isLoading = true;

 this.route.queryParams.subscribe((params) => {
 this.questionsAmount = 10;
 this.categoryId = params['categoryId'];
 this.difficulty = params['difficulty'];

 this.gameService.reset(); // AD.2

 // AD.3
 this.gameService.getQuestions(this.categoryId, this.difficulty, this.questionsAmount)
 .subscribe(({ results }) => {
 this.questions = results;
 this.currentQuestionIndex = 0;
 this.currentQuestion = results[this.currentQuestionIndex];
 this.questionsAmount = results.length;
 this.isLoading = false;
 });
 });
 }

 // AD.4
 setAnswer(event: EventData | null, answer: boolean | '') {
 this.gameService.setAnswer(
 this.currentQuestion.question,
 answer,
 JSON.parse(this.currentQuestion.correct_answer.toLowerCase()),
 );

 this.nextQuestion();
 }

 // AD.5
 nextQuestion() {
 this.currentQuestionIndex += 1;
 this.currentQuestion = this.questions[this.currentQuestionIndex];

 if (!this.currentQuestion) {
 return this.routerExtensions.navigate(['game', 'result']);
 }
 }

 // AD.6
 getQuestion() {
 let question: string = '';

 if (this.currentQuestion) {
 question = this.currentQuestion.question;
 }

 return question;
 }
}
src/app/module/game/containers/questions/questions.component.html
<!-- AD.7 -->
<ng-container *ngIf="isLoading; else game">
 <GridLayout
 class="main"
 columns="*"
 rows="*"
 >
 <ActionBar title="Questions - Loading" class="action-bar"></ActionBar>

 <!-- AD.8 -->
 <ActivityIndicator
 row="2"
 colspan="2"
 busy="true"
 width="40"
 height="40"
 class="activity-indicator"
 ></ActivityIndicator>
 </GridLayout>
</ng-container>

<ng-template #game>
 <StackLayout class="main">
 <ActionBar title="Questions" class="action-bar"></ActionBar>

 <!-- AD.9 -->
 <ng-container *ngIf="questions.length; else noQuestions">
 <!-- AD.10 -->
 <GridLayout
 class="main"
 columns="*, *"
 rows="*, auto, *, auto, *, auto, *, auto"
 >
 <Label
 row="1"
 [text]="'Question ' + (currentQuestionIndex + 1) + ' of ' + questionsAmount"
 class="question-number"
 colspan="2"
 ></Label>
 <!-- AD.11 -->
 <Label
 row="3"
 class="question-text"
 textWrap="true"
 colspan="2"
 [text]="getQuestion()"
 ></Label>

 <!-- AD.12 -->
 <Button
 text="False"
 row="7"
 col="0"
 class="answer-button"
 (tap)="setAnswer($event, false)"
 ></Button>
 <Button
 text="True"
 row="7"
 col="1"
 class="answer-button"
 (tap)="setAnswer($event, true)"
 ></Button>
 </GridLayout>
 </ng-container>

 <ng-template #noQuestions>
 <GridLayout columns="*" rows="*, auto, *">
 <StackLayout
 row="1"
 class="no-questions"
 >
 <Label
 class="no-questions-title"
 text="Error"
 ></Label>
 <Label
 class="no-questions-description"
 text="No questions in this category in our database"
 textWrap="true"
 ></Label>
 </StackLayout>
 </GridLayout>
 </ng-template>
 </StackLayout>
</ng-template>
- AD.1 - we are injecting GameService, thanks to which we have access to all necessary methods needed for the course of the game;
- AD.2 - when the question view is loaded, we restart the answer array, because there may be data from the previous game;
- AD.3 - we get 10 API questions for the selected category and difficulty level. In addition, we save the first question and its index;
- AD.4 - a method that passes answers to GameService and then runs the nextQuestion method
- AD.5 - we increase the index of the current question, thanks to which we display the next one. When the pool of questions is over, the application redirects the user to the result of the game (the result view does not exist yet);
- AD.6 - we get the content of the current question;
- AD.7 - we have divided the view of the game into several smaller ones, which display different content depending on the conditions. Simply put: if our request is still being executed and we are waiting for the questions to be downloaded, we display the loader so that the user knows that the application doesn’t stop working but just loads something;
- AD.8 - ActivityIndicator is another widget provided by NativeScript. Its goal is to inform about the performed task in the application by displaying the loader;
- AD.9 - condition checking if the request has returned the question pool, if not - we display the information that there are no questions in this category. Otherwise, we display the first question and start the game;
- AD.10 - we use the grid again, this time to display questions and the game interface;
- AD.11 - we display the question using the Label widget. It is worth mentioning that by default the text is limited to one line. Therefore, if we have longer content, we must set the textWrap attribute to true;
- AD.12 - answer buttons that start the setAnswer method when tapping on them.
In order to be able to test our newly written functionalities, we need to do one more thing - connect the Questions container to the corresponding routing. To do this, you will need to return to the game-routing.module.ts file.
src/app/module/game/game-routing.module.ts
(...)
export const routes: Routes = [
 (...)
 {
 path: 'questions',
 component: QuestionsComponent,
 },
];
(...)
Once you've done it, you can start the game and see what it looks like now. As you can see, we already have a small outline of the game logic, but the application still lacks the visual side. so at this point, complete the missing CSS files. To this end, I encourage you to switch to the next branch or fill CSS files directly from the repository.
git checkout step3
git pull origin step3
The summary view
When the user answers all the questions, we redirect to the summary view, however, due to the fact that we have not created this view yet, our application shows an error and exceeds the range of displayed questions and tries to display the 11th question out of 10. To fix this and finish the game we need to create a summary view. We are going to display the number of points the user has obtained and all questions with answers. So we have to create a new container, add it to the game module and connect it to the routing.
ng generate component ./module/game/containers/result --module ./module/game
src/app/module/game/game-routing.module.ts
(...)
export const routes: Routes = [
 (...)
 {
 path: 'result',
 component: ResultComponent,
 },
];
(...)
src/app/module/game/game.module.ts
(...)
 declarations: [
 (...)
 ResultComponent,
 ],
(...)
src/app/module/game/containers/result/result.component.ts
import { Component, OnInit } from '@angular/core';
import { GameService } from '~/app/module/core/service/game/game.service';
import { RouterExtensions } from 'nativescript-angular';

@Component({
 selector: 'tg-result',
 templateUrl: './result.component.html',
 styleUrls: ['./result.component.css'],
 moduleId: module.id,
})
export class ResultComponent implements OnInit {
 private answers: any[];
 private points: any;

 constructor(
 private gameService: GameService, // AD.1
 private routerExtensions: RouterExtensions,
 ) { }

 ngOnInit() {
 this.answers = this.gameService.getAnswers(); // AD.2
 this.points = this.gameService.getPoints(); // AD.3
 }

 // AD.4
 navigateToCategories() {
 const navigationExtras: any = {
 clearHistory: true,
 animated: false,
 skipLocationChange: true
 };

 return this.routerExtensions.navigate( ['tabs', 'default'], navigationExtras);
 }
}
src/app/module/game/containers/result/result.component.html
<StackLayout class="main">
 <!-- AD.5 -->
 <ActionBar title="Result" class="action-bar">
 <NavigationButton visibility="collapsed"></NavigationButton>
 <ActionItem text="Categories" ios.position="left" (tap)="navigateToCategories()"></ActionItem>
 </ActionBar>

 <ScrollView>
 <StackLayout>
 <!-- AD.6 -->
 <StackLayout class="points">
 <Label
 class="points-label"
 text="Your points: "
 ></Label>
 <Label
 class="points-value"
 [text]="points.points + ' of ' + points.maxPoints"
 ></Label>
 </StackLayout>
 <!-- AD.7 -->
 <StackLayout
 class="question"
 *ngFor="let answer of answers; let i = index; let isLast = last;"
 >
 <Label
 class="question-number"
 [text]="'Question ' + (i + 1)"
 ></Label>
 <Label
 class="question-text"
 textWrap="true"
 [text]="answer.question"
 ></Label>

 <FlexboxLayout class="answer">
 <Label
 class="answer-label"
 text="Your answer:"
 ></Label>
 <Label
 class="answer-value"
 [text]="' ' + answer.answer"
 [ngClass]="{
 'answer-value--incorrect': answer.answer !== answer.correctAnswer
 }"
 ></Label>
 </FlexboxLayout>
 <Label
 class="answer-label"
 [text]="'Correct answer: ' + answer.correctAnswer"
 ></Label>
 <StackLayout
 class="separator"
 *ngIf="!isLast"
 ></StackLayout>
 </StackLayout>
 </StackLayout>
 </ScrollView>
</StackLayout>
- AD.1 - we use our GameService service again. It is responsible for the logic of the game;
- AD.2 - we collect an array of answers given in the last game;
- AD.3 - we calculate the number of points the user has obtained in the game;
- AD.4 - a method that redirects to the category selection view, that is our default application view;
- AD.5 - in this view we want to slightly extend the ActionBar widget with an additional button that will redirect using the navigateToCategories method, which has already been described above. To add this button we must use an additional ActionItem widget that allows you to embed your own elements on ActionBar. In addition, we overwrite another additional NavigationButton widget, with which we just want to hide the "back" button in order to block the possibility of navigating back to the displayed questions;
- AD.6 - a container in which we display the number of points obtained;
- AD.7 - using ngFor, we iterate over all responses and separate them by a horizontal line. In addition, we declare auxiliary variables such as the iteration index and information whether the currently iterated element is the last one.
Note: The NgFor directive allows you to declare local variables such as index or information about whether the currently iterated element is the last. You can read more about local variables here.

NativeScript app improvement
At the end of this part of the series, we are going to implement some small improvements to our application.
As you've probably noticed, the API questions we have are not formatted, so entities are displayed instead of characters. E.g. "& # 039;" instead of the single quotation mark. We have to fix this because the questions don’t look impressive in this form. So we will create our own pipe, which will change entities to their corresponding characters.
ng generate module ./module/shared/entity-decode
ng generate pipe ./module/shared/entity-decode/entity-decode --module module/shared/entity-decode --spec false
src/app/module/shared/entity-decode/entity-decode.module.ts
import { NgModule } from '@angular/core';
import { EntityDecodePipe } from './entity-decode.pipe';

@NgModule({
 declarations: [EntityDecodePipe],
 exports: [EntityDecodePipe],
 imports: [ ]
})
export class EntityDecodeModule { }
src/app/module/shared/entity-decode/entity-decode.pipe.ts
import { Pipe, PipeTransform } from '@angular/core';
@Pipe({
name: 'entityDecode'
})
export class EntityDecodePipe implements PipeTransform {
transform(value: string): string {
// AD.1
const map = {
'&': '&',
'&': "&",
'<': '<',
'>': '>',
'"': '"',
''': "'",
'’': "’",
'‘': "‘",
'–': "–",
'—': "—",
'…': "…",
'”': '”'
};
return value.replace(/\&[\w\d\#]{2,5}\;/g, m => map[m]); //AD.2
}
}
- AD.1 - we define entity objects;
- AD.2 - value parameter stores the text on which pipe is used. Using the replace method, we search for all entities and then replace them with their corresponding symbols from the map object.
Next, we import the EntityDecodeModule in GameModule to have access to it and to places where we display the content of the questions, we attach our pipe.
src/app/module/game/game.module.ts
(...)
import { EntityDecodeModule } from '~/app/module/shared/entity-decode/entity-decode.module';

@NgModule({
 (...)
 imports: [
 (...)
 EntityDecodeModule,
 ],
 (...)
})
export class GameModule { }
src/app/module/game/containers/questions/questions.component.html
(...)
<Label
 class="question-text"
 textWrap="true"
 [text]="answer.question | entityDecode"
></Label>
(...)src/app/module/game/containers/questions/questions.component.html(...)
<Label
 row="3"
 class="question-text"
 textWrap="true"
 colspan="2"
 [text]="getQuestion() | entityDecode"
 ></Label>
(...)
Now when you start the game, you should see the corresponding symbols instead of the entity characters. In a few places of our code, we used the type any, which tells nothing to the viewer. It is good practice to avoid any type and using your own types instead. Therefore, the next improvement will be the creation of several interfaces and then using them in the previously mentioned places.
ng generate interface ./module/core/entity/answer/answer
ng generate interface ./module/core/entity/question/question
ng generate interface ./module/core/entity/question/question-response
ng generate interface ./module/core/entity/points/points
Then we complete the newly created interfaces.
src/app/module/core/entity/answer/answer.ts
export interface Answer {
 question: string,
 answer: boolean | string,
 correctAnswer: boolean,
}
src/app/module/core/entity/question/question.ts
export interface Question {
 category: string,
 type: string,
 difficulty: string,
 question: string,
 correct_answer: string,
 incorrect_answers: string,
}
src/app/module/core/entity/question/question-response.ts
import { Question } from '~/app/module/core/entity/question/question';

export interface QuestionsResponse {
 response_code: number,
 results: Question[],
}
src/app/module/core/entity/point/point.ts
export interface Points {
 points: number,
 maxPoints: number,
}
Now we have to replace any types with our own. Search the entire project for ": any" and then replace them with newly created interfaces.
Hint: When creating applications, we often use the methods available in the NativeScript repository. An example here is the routerExtensions.navigate method in result.component.ts, to which we pass options. As you may have noticed, the options are in any type, which we used temporarily, but at this moment we need to improve it. If you don't know what type you should use, you can easily check it using the API Reference.
In our case, we search for the navigate method, where we see that extras take the type ExtendedNavigationExtras.
Now we just need to add the missing CSS, which is why I encourage you to switch to the next branch:
git checkout step4
git pull origin step4

Well, that’s it for today! In the next part we will focus on:
- adding the ability to change game settings;
- implementing game settings and adding a time limit for the answers;
- listing the best results.
Here's PART 4 of building NativeScript app guide.
Want to create apps in cross-platform frameworks with our devs? Check our job offers and join Merixstudio team!
If needed, here you can find previous parts of my article series:
Creating a mobile app in NativeScript (Pt 1)
Creating a mobile app in NativeScript (Pt 2)
Creating a mobile app in NativeScript (Pt 3)
In this article we will focus on:
- adding the ability to change game settings;
- implementing game settings and adding a time limit to answer the questions;
- listing the best results.
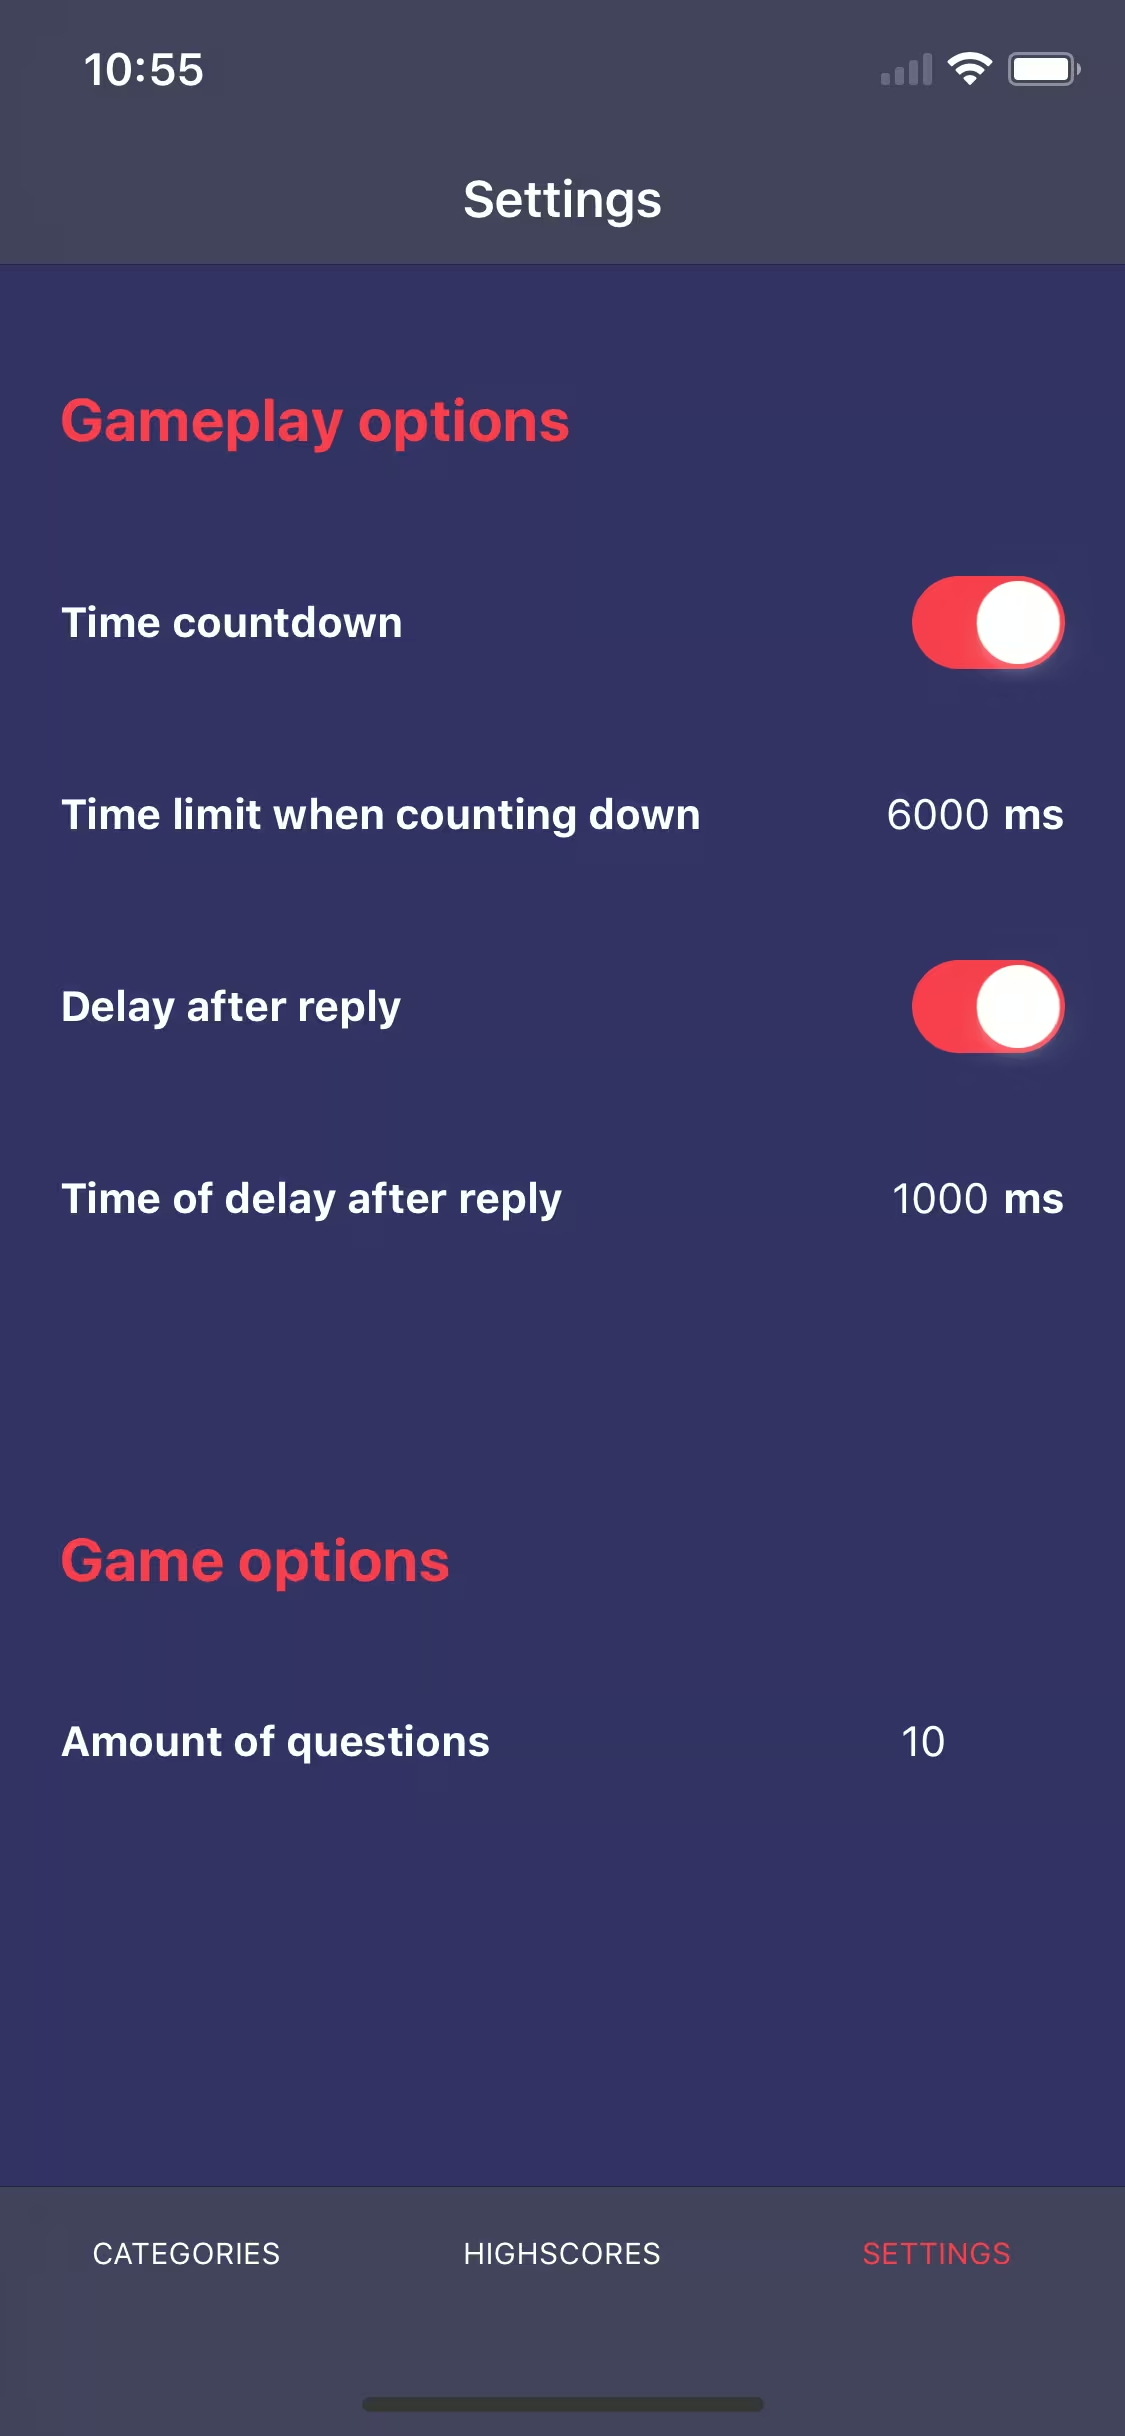
I would like our game to be flexible and to give us the opportunity to configure it in a convenient way for the user. Therefore, in the default settings, we will create a form in which you can decide whether during the game there should be a time limit for the game and if so, how long this limit should be. Another option will be the possibility of introducing a break after answering to think about its correctness and prepare for the next question. The last option will be the possibility to set the number of questions answered during one game. However, before we deal with the form itself, we need to create storage in which the game settings will be located and to which we will have access from the entire application. Of course, let's handle this with a new service.
ng generate service ./module/core/service/settings/settings --spec false
src/app/module/core/service/settings/settings.service.ts
import { Injectable } from '@angular/core';

@Injectable({
 providedIn: 'root'
})
export class SettingsService {
 private _timeCountdown: boolean = true;
 private _timeCountdownLimit: number = 6000;
 private _delay: boolean = true;
 private _delayTime: number = 1000;
 private _questionsAmount: number = 10;

 set timeCountdown(value) {
 this._timeCountdown = value;
 }

 get timeCountdown(): boolean {
 return this._timeCountdown;
 }

 set timeCountdownLimit(value) {
 this._timeCountdownLimit = value;
 }

 get timeCountdownLimit(): number {
 return this._timeCountdownLimit;
 }

 set delay(value) {
 this._delay = value;
 }

 get delay(): boolean {
 return this._delay;
 }

 set delayTime(value) {
 this._delayTime = value;
 }

 get delayTime(): number {
 return this._delayTime;
 }

 set questionsAmount(value) {
 this._questionsAmount = value;
 }

 get questionsAmount(): number {
 return this._questionsAmount;
 }
}
As you can see, this is a very simple service that stores our settings with default values and allows us to get and set them using the getter and setter methods.
Creating a time limitation
Now that we have created our SettingsService, we can go to the previously mentioned form.
src/app/module/settings/containers/settings/settings.component.ts
import { Component } from '@angular/core';
import { SettingsService } from '~/app/module/core/service/settings/settings.service';
import { TextField } from 'tns-core-modules/ui/text-field';
import { EventData } from 'tns-core-modules/data/observable';
import { Switch } from 'tns-core-modules/ui/switch';

@Component({
 selector: 'tg-settings',
 templateUrl: './settings.component.html',
 styleUrls: ['./settings.component.css'],
 moduleId: module.id,
})
export class SettingsComponent {

 constructor(
 private settingsService: SettingsService, // AD.1
 ) { }

 // AD.2
 onTextChange(args: EventData, name: string) {
 const textField = <TextField>args.object;

 this.settingsService[name] = textField.text;
 }

 // AD.3
 onCheckedChange(args: EventData, name: string) {
 const element = <Switch>args.object;

 this.settingsService[name] = element.checked;
 }

}
src/app/module/settings/containers/settings/settings.component.html
<StackLayout class="main">
 <ActionBar title="Settings" class="action-bar"></ActionBar>

 <ScrollView>
 <StackLayout>
 <StackLayout class="options-category">
 <Label
 class="title"
 text="Gameplay options"
 ></Label>

 <FlexboxLayout class="section">
 <Label text="Time countdown"></Label>
 <!-- AD.4 -->
 <Switch
 [checked]="settingsService.timeCountdown"
 (checkedChange)="onCheckedChange($event, 'timeCountdown')"
 ></Switch>
 </FlexboxLayout>

 <FlexboxLayout
 class="section"
 [ngClass]="{ 'section-disabled': !settingsService.timeCountdown }"
 >
 <Label text="Time limit when counting down"></Label>
 <FlexboxLayout class="textfield-container">
 <!-- AD.5 -->
 <TextField
 hint="Time"
 keyboardType="number"
 returnKeyType="done"
 autocorrect="false"
 maxLength="6"
 [text]="settingsService.timeCountdownLimit"
 [editable]="settingsService.timeCountdown"
 (textChange)="onTextChange($event, 'timeCountdownLimit')"
 ></TextField>
 <Label text="ms"></Label>
 </FlexboxLayout>
 </FlexboxLayout>

 <FlexboxLayout class="section">
 <Label text="Delay after reply"></Label>
 <!-- AD.6 -->
 <Switch
 [checked]="settingsService.delay"
 (checkedChange)="onCheckedChange($event, 'delay')"
 ></Switch>
 </FlexboxLayout>

 <FlexboxLayout
 class="section"
 [ngClass]="{ 'section-disabled': !settingsService.delay }"
 >
 <Label text="Time of delay after reply"></Label>
 <!-- AD.7 -->
 <FlexboxLayout class="textfield-container">
 <TextField
 hint="Time"
 keyboardType="number"
 returnKeyType="done"
 autocorrect="false"
 maxLength="6"
 [text]="settingsService.delayTime"
 [editable]="settingsService.delay"
 (textChange)="onTextChange($event, 'delayTime')"
 ></TextField>
 <Label text="ms"></Label>
 </FlexboxLayout>
 </FlexboxLayout>
 </StackLayout>

 <StackLayout class="options-category">
 <Label
 class="title"
 text="Game options"
 ></Label>
 <FlexboxLayout class="section">
 <Label text="Amount of questions"></Label>
 <!-- AD.8 -->
 <TextField
 hint="Amount"
 keyboardType="number"
 returnKeyType="done"
 autocorrect="false"
 maxLength="2"
 [text]="settingsService.questionsAmount"
 (textChange)="onTextChange($event, 'questionsAmount')"
 ></TextField>
 </FlexboxLayout>
 </StackLayout>
 </StackLayout>
 </ScrollView>
</StackLayout>
- AD.1 - as with other services, we attach SettingsService to our container to be able to use it;
- AD.2 - a method that will be listening to changes on form widget TextField, when called it will set the value for the corresponding option in the service
- AD.3 - an event handler method that will be called whenever the change event of the Switch form widget occurs, then it changes the value of the corresponding option on the service;
- AD.4 - the form field in which we decide whether the time should be counted down when answering or not. For this purpose, we use the Switch widget, which with each change calls the onCheckedChange method, to which in the second argument we pass the name of the option being changed;
- AD.5 - form field in which we enter how much time (milliseconds) the question should be displayed. If the switch from AD.4 is unchecked, then the text field is blocked. For this purpose, we use the TextField widget, which with each change calls the onTextChange method, to which in the second argument we pass the name of the option being changed;
- AD.6 - a form field in which we decide whether there should be a delay after each answer. For this purpose, we use the Switch widget, which with each change calls the onCheckedChange method, to which in the second argument we pass the name of the option being changed;
- AD.7 - form field in which we enter how much time (milliseconds) the delay should last. If the switch from AD.6 is unchecked then this text field is blocked. For this purpose, we use the TextField widget, which with each change calls the onTextChange method, to which in the second argument we pass the name of the option being changed;
- AD.8 - form field in which we enter the number of questions we get per game. For this purpose, we use the TextField widget, which with each change starts the onTextChange method, to which in the second argument we pass the name of the option being changed.
Adding a time bar - countdown feature
Now we can apply SettingsService directly to the game logic and add a countdown feature to each question. We want the bar to appear at the very top during the game, and this bar will decrease with the timer counting down for a given question. We are going to use a GridLayout to create the time bar.
src/app/module/game/containers/questions/questions.component.ts
import { Component, OnDestroy, OnInit } from '@angular/core';
import { ActivatedRoute } from '@angular/router';
import { Button } from 'tns-core-modules/ui/button';
import { EventData } from 'tns-core-modules/data/observable';
import { RouterExtensions } from 'nativescript-angular';
import { GameService } from '~/app/module/core/service/game/game.service';
import { SettingsService } from '~/app/module/core/service/settings/settings.service';
import { Question } from '~/app/module/core/entity/question/question';

@Component({
 selector: 'tg-questions',
 templateUrl: './questions.component.html',
 styleUrls: ['./questions.component.css'],
 moduleId: module.id,
})
export class QuestionsComponent implements OnInit, OnDestroy {
 private categoryId: string;
 private difficulty: string;
 private questions: Question[];
 private currentQuestion: Question;
 private currentQuestionIndex: number;
 private questionsAmount: number;
 private isLoading: boolean;
 private intervalRef: number;
 private columns: string;
 private countdownPercent: number;
 private preview: boolean;
 private timeCountdownLimit: number;
 private delayTime: number;
 private timeCountdown: boolean;
 private delay: boolean;

 constructor(
 private route: ActivatedRoute,
 private routerExtensions: RouterExtensions,
 private gameService: GameService,
 private settingsService: SettingsService, // AD.1
 ) { }

 ngOnInit() {
 this.isLoading = true;

 this.timeCountdownLimit = this.settingsService.timeCountdownLimit; // AD.2
 this.delayTime = this.settingsService.delayTime; // AD.2
 this.timeCountdown = this.settingsService.timeCountdown; // AD.2
 this.delay = this.settingsService.delay; // AD.2

 this.route.queryParams.subscribe((params) => {
 this.questionsAmount = this.settingsService.questionsAmount; // AD.2
 this.categoryId = params['categoryId'];
 this.difficulty = params['difficulty'];

 this.gameService.reset();

 this.gameService.getQuestions(this.categoryId, this.difficulty, this.questionsAmount)
 .subscribe(({ results }) => {
 this.setProgressbarWidth(100); // AD.4

 this.questions = results;
 this.currentQuestionIndex = 0;
 this.currentQuestion = results[this.currentQuestionIndex];
 this.questionsAmount = results.length;
 this.isLoading = false;

 // AD.5
 if (this.timeCountdown) {
 this.runCountdown();
 }
 });
 });
 }

 // AD.6
 ngOnDestroy() {
 clearInterval(this.intervalRef);
 }

 // AD.3
 setProgressbarWidth(percent) {
 this.columns = percent + '*,' + (100 - percent) + '*';
 }

 // AD.7
 runCountdown() {
 const totalTime = this.timeCountdownLimit / 10;
 let countDownTime = this.timeCountdownLimit / 10;
 this.countdownPercent = 100;

 this.intervalRef = setInterval(() => {
 countDownTime = countDownTime - 1;
 this.countdownPercent = (countDownTime * 100) / totalTime;

 this.setProgressbarWidth(this.countdownPercent);
 if (this.countdownPercent < 0) {
 clearInterval(this.intervalRef);
 this.setAnswer(null, '', 0);
 }
 }, 10);
 }

 setAnswer(event: EventData | null, answer: boolean | '', timeout: number = 1000) {
 if (this.preview) return; // AD.8

 clearInterval(this.intervalRef); // AD.9
 this.preview = true; // AD.8
 let ref;

 // AD.10
 if (event) {
 ref = <Button>event.object;
 ref.class = 'answer-button selected';
 }

 this.gameService.setAnswer(
 this.currentQuestion.question,
 answer,
 JSON.parse(this.currentQuestion.correct_answer.toLowerCase()),
 );

 // AD.12
 if (!this.delay) {
 timeout = 0;
 }

 // AD.11
 setTimeout(() => {
 this.nextQuestion();

 if (event) {
 ref.class = 'answer-button';
 }
 }, timeout);
 }

 nextQuestion() {
 this.preview = false; // AD.8
 this.currentQuestionIndex += 1;
 this.currentQuestion = this.questions[this.currentQuestionIndex];

 if (!this.currentQuestion) {
 return this.routerExtensions.navigate(['game', 'result']);
 }

 // AD.5
 if (this.timeCountdown) {
 this.runCountdown();
 }
 }

 getQuestion() {
 let question: string = '';

 if (this.currentQuestion) {
 question = this.currentQuestion.question;
 }

 return question;
 }
}
- AD.1 - we attach SettingsService to our container to be able to use it;
- AD.2 - we get the currently set options and save them to the QuestionsComponent class property;
- AD.3 - a method by which it will transfer the number of columns in GridLayout, thanks to which we will achieve the effect of a decreasing bar. Eg "100 *, 0 *" will display the bar at 100% width, and "25 *, 75 * will display the bar at 25% width;
- AD.4 - we set 100% of the bar width at the beginning of the game;
- AD.5 - if the countdown option is enabled, we run a new runCountdown method, which will be responsible for it;
- AD.6 - we are going to use the setInterval method, which will count down indefinitely until we interrupt it. Therefore, if the user switches to another view during the game, we will delete the interval because it will no longer be needed;
- AD.7 - runCountdown method, in which - based on the remaining time - we calculate every 10ms the current width of the bar and set it using the setProgressbarWidth method. In case the time runs out and the user has not answered, we run the setAnswer method with an empty answer;
- AD.8 - if the user has already answered the question once, we block the possibility of replying. We need this functionality because we have added the pause option after answering the question;
- AD.9 - if the user has answered, we stop the countdown by removing the interval;
- AD.10 - after answering on the selected button, we add the "selected" CSS class so that the user can be sure which answer he has chosen;
- AD.11 - we use the setTimeout method to add a time pause after answering. After the time runs out, we display the next question;
- AD.12 - if the time pause is disabled in the options, we set this time to 0, which is equal to no pause.
src/app/module/game/containers/questions/questions.component.html
<ng-container *ngIf="isLoading; else game">
 <GridLayout
 class="main"
 columns="*"
 rows="*"
 >
 <ActionBar title="Questions - Loading" class="action-bar"></ActionBar>

 <ActivityIndicator
 row="2"
 colspan="2"
 busy="true"
 width="40"
 height="40"
 class="activity-indicator"
 ></ActivityIndicator>
 </GridLayout>
</ng-container>

<ng-template #game>
 <StackLayout class="main">
 <ActionBar title="Questions" class="action-bar"></ActionBar>

 <ng-container *ngIf="questions.length; else noQuestions">
 <!-- AD.1 -->
 <GridLayout [columns]="columns" class="progressbar">
 <StackLayout col="0" class="progressbar-value"></StackLayout>
 </GridLayout>

 <GridLayout
 class="main"
 columns="*, *"
 rows="*, auto, *, auto, *, auto, *, auto"
 >
 <Label
 row="1"
 [text]="'Question ' + (currentQuestionIndex + 1) + ' of ' + questionsAmount"
 class="question-number"
 colspan="2"
 ></Label>
 <Label
 row="3"
 class="question-text"
 textWrap="true"
 colspan="2"
 [text]="getQuestion() | entityDecode"
 ></Label>

 <!-- AD.2 -->
 <Button
 text="False"
 row="7"
 col="0"
 class="answer-button"
 (tap)="setAnswer($event, false, delayTime)"
 ></Button>
 <!-- AD.2 -->
 <Button
 text="True"
 row="7"
 col="1"
 class="answer-button"
 (tap)="setAnswer($event, true, delayTime)"
 ></Button>
 </GridLayout>
 </ng-container>

 <ng-template #noQuestions>
 <GridLayout columns="*" rows="*, auto, *">
 <StackLayout
 row="1"
 class="no-questions"
 >
 <Label
 class="no-questions-title"
 text="Error"
 ></Label>
 <Label
 class="no-questions-description"
 text="No questions in this category in our database"
 textWrap="true"
 ></Label>
 </StackLayout>
 </GridLayout>
 </ng-template>
 </StackLayout>
</ng-template>
- AD.1 - we pass the columns property to GridLayout, which dynamically changes, thanks to which the effect of a decreasing bar is created;
- AD.2 - to the answer buttons created in the previous article, as a result of taping, we pass additional delayTime, which is got from the settings.
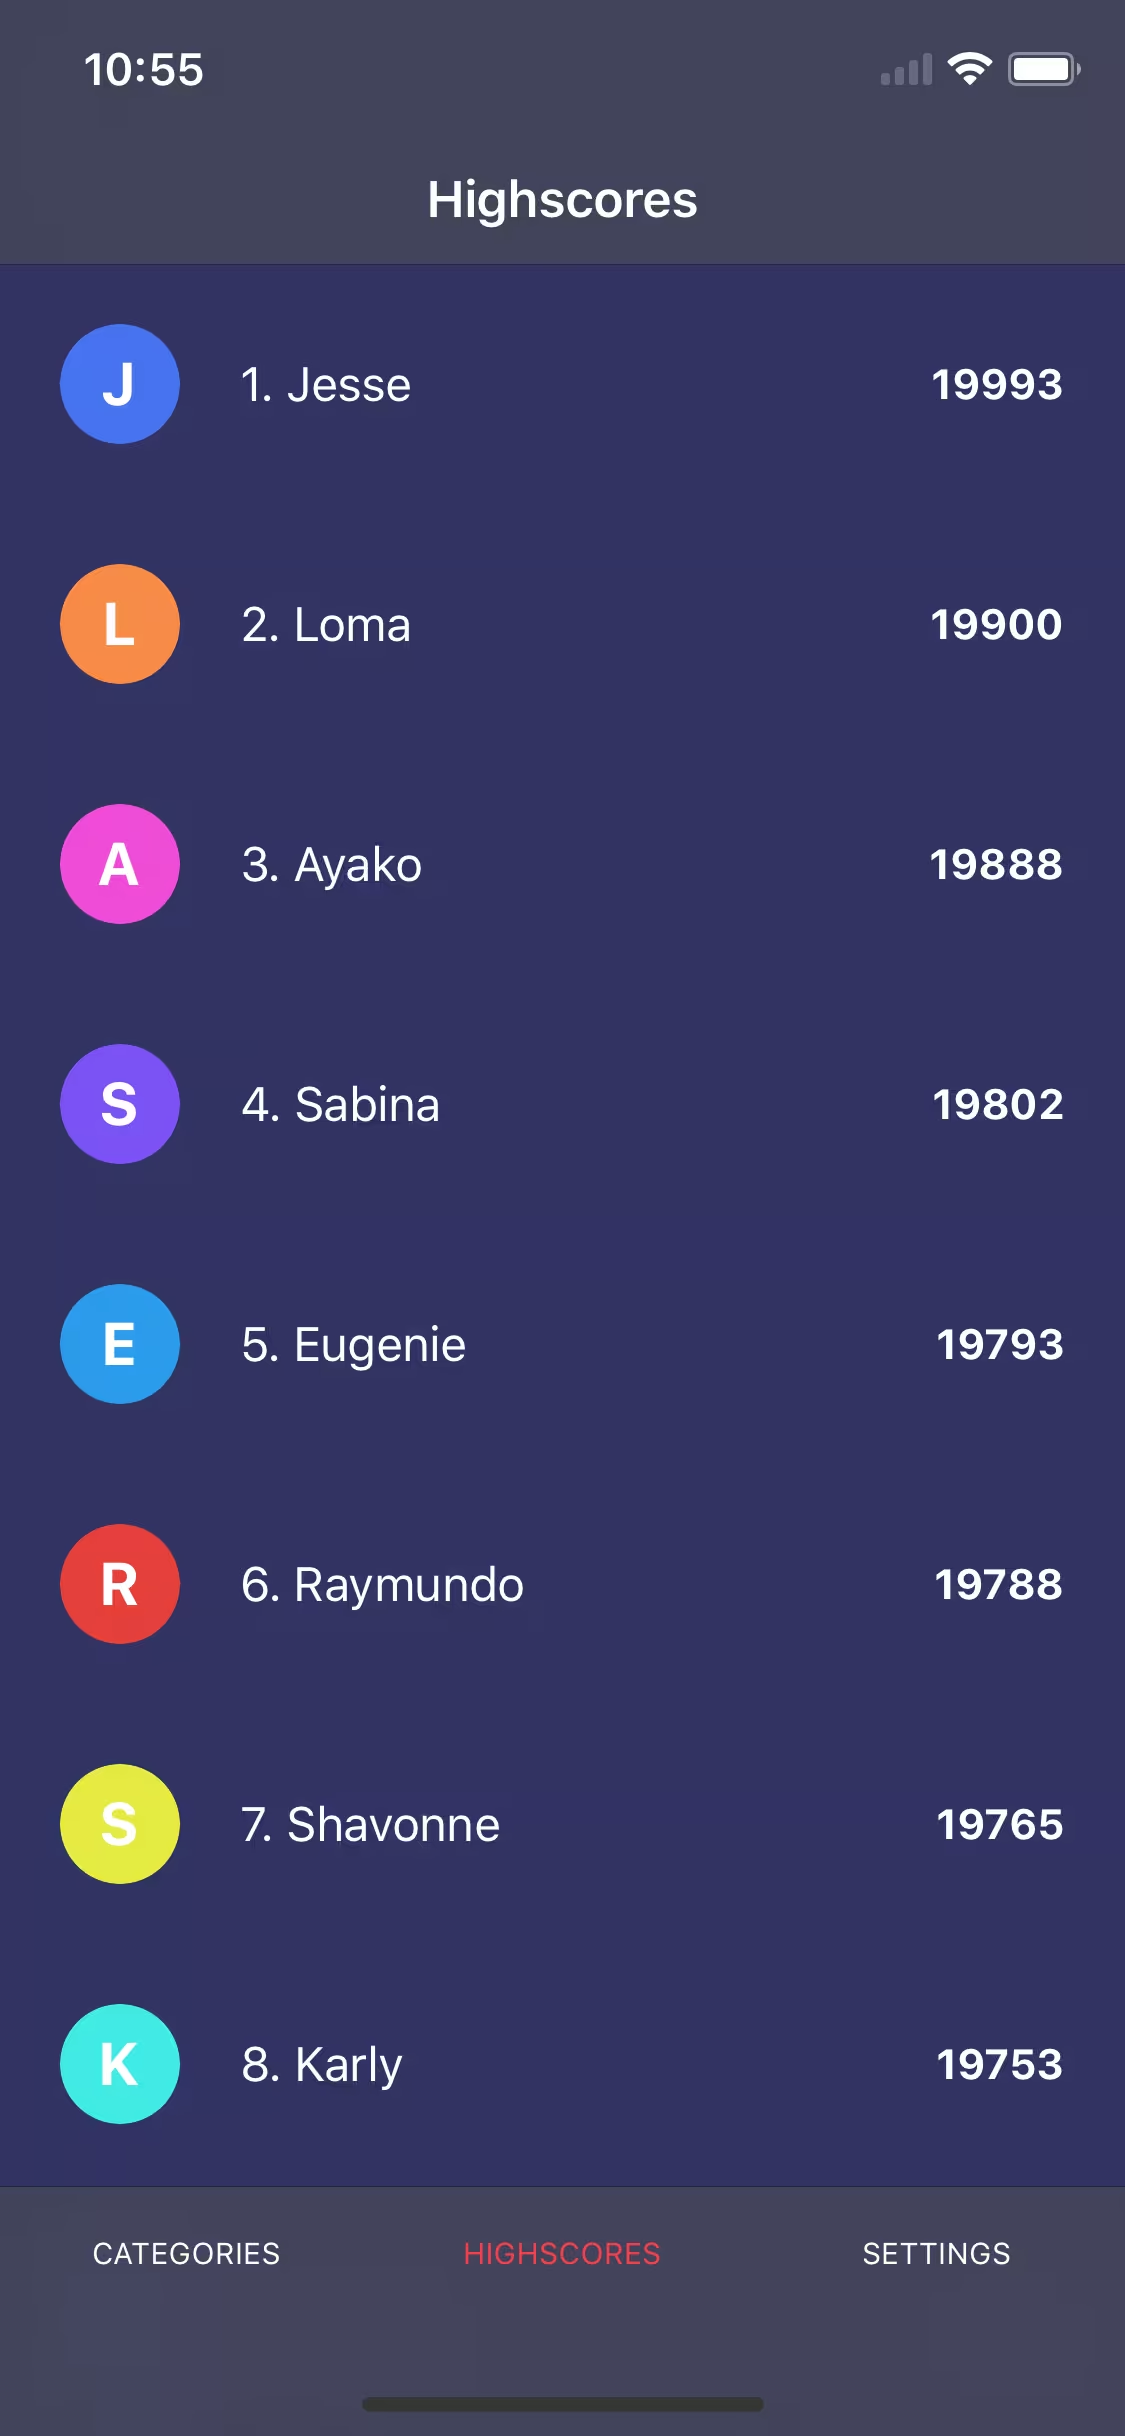
Displaying the list of the best users
At the moment our application is almost finished, only the last tab on which we will display the users who have obtained the highest points is left. Unfortunately, due to the fact that we use the public API, not our own, we have no way to get the results and save them via the API. Therefore, we are going to create a service that will only simulate getting the list of the best players and then display them. We start by generating a new service and a necessary interface to avoid using any type.
ng generate interface ./module/core/entity/score/score
ng generate service ./module/core/service/highscores/highscores --spec false
Now we write the code for our new files, and then I’ll explain the spots that may raise doubts.
src/app/module/core/entity/score/score.ts
export interface Score {
 name: string,
 points: string,
}
src/app/module/core/service/highscores/highscores.service.ts
import { Injectable } from '@angular/core';
import { Score } from '~/app/module/core/entity/score/score';

@Injectable({
 providedIn: 'root'
})
export class HighscoresService {
 // AD.1
 private list = new Array<Score>(
 { name: 'Jesse', points: '19993' },
 { name: 'Loma', points: '19900' },
 { name: 'Ayako', points: '19888' },
 { name: 'Sabina', points: '19802' },
 { name: 'Eugenie', points: '19793' },
 { name: 'Raymundo', points: '19788' },
 { name: 'Shavonne', points: '19765' },
 { name: 'Karly', points: '19753' },
 { name: 'Stanford', points: '19732' },
 { name: 'Rosalina', points: '19722' },
 { name: 'Vennie', points: '19711' },
 { name: 'Nerissa', points: '19632' },
 { name: 'Christena', points: '19543' },
 { name: 'Brandee', points: '19421' },
 { name: 'Shellie', points: '19333' },
 { name: 'Mirtha', points: '19209' },
 { name: 'Alleen', points: '19124' },
 { name: 'Sally', points: '18992' },
 { name: 'Ashlee', points: '18901' },
 { name: 'Ellena', points: '18888' },
 { name: 'Cleta', points: '17435' },
 { name: 'Inez', points: '16434' },
 { name: 'Sang', points: '15543' },
 { name: 'Sherlene', points: '14321' },
 { name: 'Shalonda', points: '13654' },
 { name: 'Antione', points: '12763' },
 { name: 'Kellie', points: '11275' },
 { name: 'Lorena', points: '10537' },
 { name: 'Cindy', points: '9854' },
 { name: 'Audrie', points: '9814' },
 { name: 'Latoria', points: '9754' },
 { name: 'Rachell', points: '9632' },
 { name: 'Beau', points: '8432' },
 { name: 'Debera', points: '8112' },
 { name: 'Faustina', points: '7432' },
 { name: 'Tyisha', points: '6932' },
 { name: 'Lucina', points: '5751' },
 { name: 'Rolande', points: '4641' },
 { name: 'Wilbur', points: '3657' },
 { name: 'Laree', points: '2632' },
 { name: 'Ben', points: '1742' },
 { name: 'Tommy', points: '1253' },
 { name: 'Rikki', points: '954' },
 { name: 'Breana', points: '654' },
 { name: 'Iraida', points: '531' },
 { name: 'Talisha', points: '453' },
 { name: 'Kandace', points: '329' },
 { name: 'Jestine', points: '251' },
 { name: 'Pedro', points: '42' },
 { name: 'Rana', points: '12' },
 );

 // AD.2
 getList(): Score[] {
 return this.list;
 }
}
- AD.1 - we create a private class property in which we rigidly write the list that we would normally receive from the API;
- AD.2 - getList method, which returns the entire result list.
Now just display the user list in the highscores tab.
src/app/module/highscores/containers/highscores-list/highscores-list.component.ts
import { Component, OnInit } from '@angular/core';
import { HighscoresService } from '~/app/module/core/service/highscores/highscores.service';
import { isIOS } from 'tns-core-modules/platform';
import { Score } from '~/app/module/core/entity/score/score';

declare var UITableViewCellSelectionStyle;

@Component({
 selector: 'tg-highscores-list',
 templateUrl: './highscores-list.component.html',
 styleUrls: ['./highscores-list.component.css'],
 moduleId: module.id,
})
export class HighscoresListComponent implements OnInit {
 private highscores: Score[];

 constructor(
 private highscoresService: HighscoresService, // AD.1
 ) { }

 ngOnInit() {
 this.highscores = this.highscoresService.getList(); // AD.2
 }

 // AD.3
 onItemLoading(args) {
 if (isIOS) {
 const iosCell = args.ios;
 iosCell.selectionStyle = UITableViewCellSelectionStyle.None;
 }
 }
}
src/app/module/highscores/containers/highscores-list/highscores-list.component.html
<StackLayout class="main">
 <ActionBar title="Highscores" class="action-bar"></ActionBar>

 <!-- AD.4 -->
 <ListView
 class="list"
 separatorColor="#333364"
 [items]="highscores"
 (itemLoading)="onItemLoading($event)"
 >
 <!-- AD.5 -->
 <ng-template let-score="item" let-i="index + 1">
 <FlexboxLayout class="list-item">
 <StackLayout orientation="horizontal">
 <!-- AD.6 -->
 <Label
 [class]="'avatar color-' + (i + 0) % 10"
 [text]="score.name[0]"
 ></Label>
 <Label
 [text]="i + '. ' + score.name"
 class="name"
 ></Label>
 </StackLayout>
 <Label
 [text]="score.points"
 class="points"
 ></Label>
 </FlexboxLayout>
 </ng-template>
 </ListView>
</StackLayout>
- AD.1 - we attach HighscoresService to our container to be able to use it;
- AD.2 - we get a list of the best results;
- AD.3 - on iOS devices, after tapping on a list item, the backlight effect appears. In our case, we want to turn off this effect because it suggests that something should happen.
- AD.4 - we use the ListView widget, which works very well for displaying large lists;
- AD.5 - any element of the list can consist of several elements directly inside ListView, so it is good to wrap it in ng-template;
- AD.6 - we create a user avatar that will consist of the first letter of the player's nickname. In addition, based on the iteration index, we create a CSS class that will be responsible for the avatar color. We take the rest from dividing the index by 10, thanks to which we get numbers from 0-9.
Finishing touches
Now we just need to add missing CSS, that’s why I encourage you to switch to the next, and the last, branch.
git checkout master
git pull origin master
And here we are! Our mobile application is ready. I hope that thanks to this short series of articles you have gained the basic knowledge of creating mobile applications in NativeScript and that I encouraged you to expand your knowledge in this area. To test our application on a mobile device in a simple way, you only need to download from the AppStore or Google Play an application called "Nativescript Playground" and then run the following command in the terminal
tns preview
A QR code will be displayed, and you only need to scan it using the Nativescript Playground application. After a moment, our application should load on your phone. If you are interested in publishing applications on the AppStore or Google Play, there are comprehensive guides on NativeScript documentation for both iOS and Android.
Want to create apps in cross-platform frameworks with our devs? Check our job offers and join Merixstudio team!

.svg)
.svg)
.svg)
.avif)

.avif)
.avif)
.avif)