.svg)

The two core areas we are covering are how to add TypeScript for when working with hooks and passing props to children from parent components, since these two are what is unique to React. The hooks covered are useState, useEffect, useRef, useReducer and useContext. We’ll also learn how to pass functions, children, and other props to child components.
A few words about TypeScript
JavaScript, as you might know, is a dynamic language and therein lies the space for simple errors during development that could cause bugs further on. To assist with this, in 2012, Microsoft introduced a programming language named TypeScript that is a superset of (and complies to) JavaScript.
TypeScript is an additional layer on top of the JavaScript we know but with static typing.
If a function expects a number, you have to provide it with a number. If it's expecting a string, well that's what it's going to get – otherwise you run the risk of TypeScript yelling at you during development. Some companies, for example Merixstudio, even have CI/CD processes that fail the build if you try to push any code that has TypeScript errors. I won't go too deep into why TypeScript is so great, as a colleague has covered plenty about that already.

How to use TypeScript types with React components
Since the title of the blog post promised that I will prime you into using TypeScript with JavaScript, it will focus on using TypeScript with two features that are unique to React: passing props from parent to children and hooks.
For this, I am operating under the assumption that you are aware of the basic types of data in TypeScript and concepts such as interfaces and types. If you need a refresher or a good introduction to TypeScript, I highly recommend the TS documentation and this video:
You would also need to have some knowledge of React and JSX. The hooks we will be touching on are five of the most often used ones:
As a bonus, I will also cover the topic of how to create get requests using axios, a powerful and popular promise based HTTP client for the browser.
How are we going to learn the above? Through building an app of course! Such an approach in my opinion helps you get introduced to novel concepts and provides the possibility of seeing them being used in practice.
The app we are going to be building is a state-of-the-art search app for books, titled “Book Search App”. That’s the way it looks like:
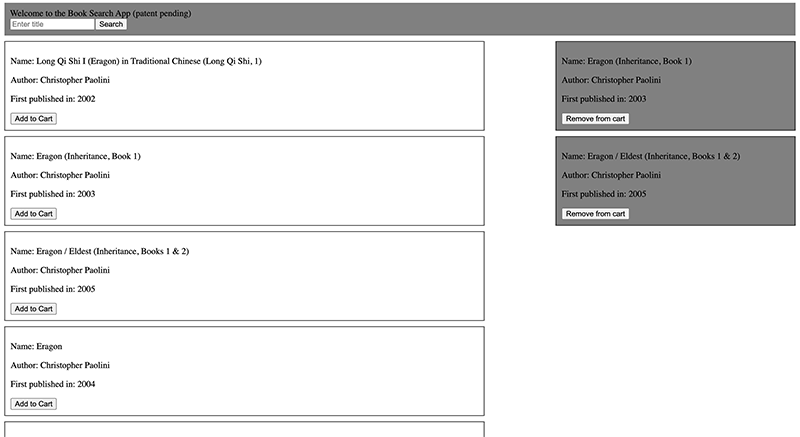
The Book Search App
The basic functionalities of the app are the following:
- As soon as the page loads, the input is focused on letting the user type the name of a book or author. On pressing enter, the search query is made to the API and the results are fetched and displayed under the search bar.
- The user can then choose to add a book to the cart. When they do, the book is added to the cart and is visible in the column to the right with a gray background.
- If the user would like to remove the book from the cart, they can do that by clicking on the “Remove from cart” button.
Onto the code! The first things we have to do are described below:
- Clone the main branch of this Next.js repository. I added TypeScript and ESLint into it to make your dev experience a better one. If you would like to see the final code, you’ll be able to do so in the final branch of the same repository.
- Take a quick look at what is being returned at the Open Library. This is the endpoint from which we will fetch the books. Feel free to adjust the title and see what results are returned.
Using TypeScript with useRef and useEffect
Now once the project is set up and you have the dev server running, create a folder by the name of “components” in the root of the project. You can then create a subfolder called “home” in it, as that is where we keep all the components on your home page (index.tsx). You can then create a file called InputBox.tsx. The code inside it looks as follows:
import {
 useEffect,
 useRef,
} from 'react';

const InputBox = () => {
 const inputRef = useRef<HTMLInputElement>(null);

 useEffect(() => {
   inputRef.current?.focus();
 }, []);

 return (
   <div style={{ backgroundColor: 'gray', padding: '10px' }}>
     <form>
       <input
         ref={inputRef}
         placeholder="Enter title"
         value=""
       />
       <input
         value="Search"
         type="submit"
       />
     </form>
   </div>
 );
};

export default InputBox;
As you can see, it's a pretty straightforward component, rendering one input field to enter text and another to submit the text. If you have worked with the useRef before, you would know that it allows us to access and manipulate an element’s DOM directly. This is what we do with useEffect here, which basically focuses on the input as soon as the component is mounted. Where we have integrated TypeScript in this component is when we declared the inputRef.
const inputRef = useRef<HTMLInputElement>(null);
This HTMLInputElement is us basically declaring that inputRef will be the ref of an input element. TypeScript then begins to work in our favor by suggesting properties and methods for manipulating the options, layout, and presentation of input elements. If we didn't add that, the inputRef would be of the HTMLInputElement type, we would not have access to those helpful suggestions. If you want to access the ref of a div element, just make sure you replace the HTMLInputElement with HTMLDivElement.
As for using TypeScript with useEffect, we did not see much of it in this component. The most frequent type of typing that we do inside the useEffect hook would be if we defined a function inside it and passed some parameters inside the function. So, if you have this function inside the useEffect that will take an object as a parameter, make sure to create an interface for that object, and pass it in.
How about checking out a React-based app? Click here to see the Norma Precision case study!
Using TypeScript with useState
One thing you might have noticed in the above component is that we have not attached event handlers to the input field and the submit button. We will, therefore, pass the functions needed to control these events from the parent component (index.tsx) to the child component (InputBox.tsx). index.tsx now looks as follows:
import { useState } from "react";
import InputBox from "../components/home/InputBox";

const Index = () => {
 const [bookTitle, setBookTitle] = useState<string>("");

 const searchForBook = () => {
   console.log(bookTitle)
 };

 return (
   <section >
       <InputBox
         setBookTitle={setBookTitle}
         bookTitle={bookTitle}
         searchForBook={searchForBook}
       >
         <h1>Welcome to the Book Search App (patent pending)</h1>
       </InputBox>
   </section>
 );
};

export default Index;
What is essentially happening here is that we have a useState hook with an empty string as the initial value. We have also explicitly typed data that can be stored inside this hook, as you can see. So, anytime we try to change the value of bookTitle, this value has to be of the type string, unless you want TypeScript to throw an error.
const [bookTitle, setBookTitle] = useState<string>("");
For simple states such as the one here where we only have a string, we really don’t have to explicitly type the type as <string>, since TypeScript is pretty smart about inferring it. But if the state is complicated and contains unions such as the one below, it is wise to type them out.
const [bookTitle, setBookTitle] = useState<Array<{ title: string }> | null>(null);
Typing component props with TypeScript
In the rest of the component, you will see that I am passing the setBookTitle, bookTitle and the searchForBook function as props to the InputBox.tsx component. I am also passing a <h1> heading as a child to the InputBox.tsx component. So let's see how we can go about rendering these in the InputBox.tsx component.
import {
 useEffect,
 useRef,
 ReactNode,
 ChangeEvent,
 FormEvent
} from "react";

interface InputBoxProps {
 children: ReactNode;
 setBookTitle: (bookTitle: string) => void;
 bookTitle: string;
 searchForBook: () => void;
}

const InputBox = ({
 children,
 setBookTitle,
 bookTitle,
 searchForBook,
}: InputBoxProps) => {

 const handleChange = (event: ChangeEvent<HTMLInputElement>) => {
   setBookTitle(event.target.value);
 };

 const handleSubmit = (event: FormEvent<HTMLInputElement>) => {
   event.preventDefault();
   searchForBook();
 };

 const inputRef = useRef<HTMLInputElement>(null);

 useEffect(() => {
   inputRef.current?.focus();
 }, []);

 return (
   <div style={{ backgroundColor: "gray", padding: "10px" }}>
     {children}
     <form>
       <input
         ref={inputRef}
         placeholder="Enter title"
         value={bookTitle}
         onChange={handleChange}
       />
       <input onClick={handleSubmit} value="Search" type="submit" />
     </form>
   </div>
 );
};

export default InputBox;
I know the code above looks a tad scarier looking, so let's dissect it from the top. At the top, you can see me declaring an interface with the name “InputBox props”. This interface contains information about the types of the props I am passing to this component. Let's take a look at them:
interface InputBoxProps {
 children: React.ReactNode;
 setBookTitle: (bookTitle: string) => void;
 bookTitle: string;
 searchForBook: () => void;
}
I have assigned children with the type ReactNode, as it is the best way to type children at the moment (here’s some more information about typing component props). The setBookTitle is a function that is passed as a props since its only job is to take a parameter of the type string, update the value of the bookTitle and not return anything in the index.tsx component. The bookTitle props is a string we typed earlier, and the searchForBook is the function that takes the bookTitle value and console logs it.

I added the InputBoxProps interface at the top of the component here as it makes it easy to follow. But if you are working on a real project, make sure to add your interface and types in a separate file in order to keep the code clean. In my case, I created an interfaces.ts file in the home folder, added it there, and imported it into this component.
const InputBox = ({
 children,
 setBookTitle,
 bookTitle,
 searchForBook,
}: InputBoxProps) => {
Since we have declared the types of props we are expecting in the interface, all we have to do now is destructure the props when they are being passed to this component, and make sure we add the InputBoxProps interface to it (see above). Notice that anytime we do not provide the child component with the props it is waiting for, TypeScript will ask you for it. Notice how TypeScript is very specific about the type of props it is asking for.
TypeScript throwing an error message when the child component did not receive the necessary props.
Handling events with TypeScript
Now that we have covered how to pass props to a child component from a parent, let's take a look at how we can type events in forms. Take a careful look below:
 const handleChange = (event: ChangeEvent<HTMLInputElement>) => {
   setBookTitle(event.target.value);
 };

 const handleSubmit = (event: FormEvent<HTMLInputElement>) => {
   event.preventDefault();
   searchForBook();
 };
What is happening in handleChange is that we update the value of the input when the onChange event is invoked. handleSubmit basically prevents the page from a hard refresh when the form is submitted and then invokes the searchForBook() that was passed to it from the parent. In both event handlers, we have typed the type of the event object.
💡 MERIX TIP!
Why does it pay off to type the type of events in TypeScript?
By explicitly typing the type of event, you make sure TypeScript will help you by providing a list of the special properties and methods available in it.
Example of how typing the event type in the function parameter gives you suggestions of methods and properties available in that event
For this tutorial, I used the native input fields for demonstration purposes. If you are doing any heavy duty form and input handling, I recommend going with a library such as the React Hook Forms which supports TypeScript.
If you have done all the above steps, you should now be able to type the name of a book or author in the Input field, press enter and be able to see that value in your console. If you cannot, head over to the final code and take a look at what you might be missing.
Keen on learning more? Check out other tech stories in our Insights section!
Using TypeScript with useReducer and useContext
Now we will move onto understanding how to use TypeScript with the useReducer and useContext hooks. These are important as they will allow us to create a global store that will hold our state, so that we can access it from anywhere in our application.
The first thing to do is to create a folder by the name of contexts in the root folder and a file in it titled BookContext.tsx. In it, we have the below code which is just JSX without any types. I want you to think of this as the ”before code” and take you through it really quickly to help understand what is happening here before we add the types.
PS, if you have not worked with useReducer, createContext and useContext to create a store before, I highly recommend doing some reading on them as they are a tad complicated. You can also check out this React Context & Hooks video series which I found to be quite informational. This would help you understand how TypeScript makes our life easier.
import {
createContext,
useReducer
} from "react";
import { AxiosInstance } from "../instances/AxiosInstance";

export const initialState = {
 data: null,
 cart: [],
 isLoading: false,
 error: false,
 searchForTitle: () => {},
 addToCart: () => {},
 removeFromCart: () => {},
};

export const BookContext = createContext(initialState);

const reducer = (
 state,
 action
) =>  {
 switch (action.type) {
   case "setData":
     return {
       ...state,
       data: action.payload,
       isLoading: false,
       error: false,
     };
   case "addToCart":
     return {
       ...state,
       cart: [...state.cart, action.payload],
     };
   case "removeFromCart":
     return {
       ...state,
       cart: state.cart.filter(
         (book) => book._version_ !== action.payload._version_
       ),
     };
   case "setIsLoading":
     return {
       ...state,
       isLoading: true,
       data: null,
     };
   case "error":
     return {
       ...state,
       error: true,
     };
   default:
     return state;
 }
}

export const BookProvider = ({ children }) => {
 const [state, dispatch] = useReducer(reducer, initialState);

 const searchForTitle = async (title) => {
   try {
     dispatch({
       type: "setIsLoading",
     });

     const {
       data: { docs },
     } = await AxiosInstance.get("search.json", {
       params: {
         title,
       },
     });

     dispatch({
       type: "setData",
       payload: docs,
     });
   } catch (error) {
     dispatch({
       type: "error",
     });
   }
 };

 const addToCart = (book) => {
   dispatch({
     type: "addToCart",
     payload: book,
   });
 };

 const removeFromCart = (bookToRemove) => {
   dispatch({
     type: "removeFromCart",
     payload: bookToRemove,
   });
 };

 return (
   <BookContext.Provider
     value={{
       data: state.data,
       cart: state.cart,
       isLoading: state.isLoading,
       error: state.error,
       searchForTitle,
       addToCart,
       removeFromCart,
     }}
   >
     {children}
   </BookContext.Provider>
 );
};
So, right at the top we have an initialState object which has several properties, with which we initialize the context. Then we export it. Right under that we have the reducer function of the useReducer hook, with which we handle the state logic. This reducer keeps an eye for the type of the object that is dispatched to it and modifies the state. Right under that, we have the BookProvider function which holds three functions: searchForTitle, addToCart, and the removeFromCart. Let's go through them really quick to understand their purpose.
const searchForTitle = async (title) => {
   try {
     dispatch({
       type: "setIsLoading",
     });

     const {
       data: { docs },
     } = await AxiosInstance.get("search.json", {
       params: {
         title,
       },
     });

     dispatch({
       type: "setData",
       payload: docs,
     });
   } catch (error) {
     dispatch({
       type: "error",
     });
   }
 };
This async function accepts a title parameter. Before running the GET request, it dispatches the setIsLoading object to the state, so that the user will be shown a loading screen. The passed title is then used to fetch the data using the axios library. You will see that I have created an axios instance not to type the base url too frequently. You can add this axios instance to your project by installing axios, creating a folder called instances on the root and creating a file named AxiosInstance.ts which contains the following.
import axios from 'axios';

export const AxiosInstance = axios.create({
 baseURL: process.env.NEXT_PUBLIC_API_URL,
});
If the request is successful and we get data back, we dispatch an action with that data to the state. If the request is unsuccessful, we dispatch an action with the type error, so that the user will be notified that something is not quite right.
const addToCart = (book) => {
   dispatch({
     type: 'addToCart',
     payload: book,
   });
 };
This one is quite simple, as all it does is take a book object as a parameter and dispatches an action with that book to the cart under the addToCart type.
const removeFromCart = (bookToRemove) => {
   dispatch({
     type: "removeFromCart",
     payload: bookToRemove,
   });
 };
All this function does is take the book that was provided to it and dispatch an action with it with the removeFromCart object.
We then pass all these functions and values from the state to the BookContext.Provider which then passes it to whatever components it is wrapped around.
So, the next step is to wrap this provider around the whole app! We will get to that, but first we have to add TypeScript types to our context component. Right now it has no types and there is plenty of space for unintended errors to occur. This is how it should look like with types.
import {
  createContext,
  useReducer,
  ReactNode
} from "react";
import { AxiosInstance } from "../instances/AxiosInstance";
import {
 Book,
 InitiaStateValue,
 SearchResultData,
 UserAction,
} from "./interfaces";

export const initialState: InitiaStateValue = {
 data: null,
 cart: [],
 isLoading: false,
 error: false,
 searchForTitle: () => {},
 addToCart: () => {},
 removeFromCart: () => {},
};

export const BookContext = createContext(initialState);

const reducer = (
 state: InitiaStateValue,
 action: UserAction
): InitiaStateValue => {
 switch (action.type) {
   case "setData":
     return {
       ...state,
       data: action.payload,
       isLoading: false,
       error: false,
     };
   case "addToCart":
     return {
       ...state,
       cart: [...state.cart, action.payload],
     };
   case "removeFromCart":
     return {
       ...state,
       cart: state.cart.filter(
         (book) => book._version_ !== action.payload._version_
       ),
     };
   case "setIsLoading":
     return {
       ...state,
       isLoading: true,
       data: null,
     };
   case "error":
     return {
       ...state,
       error: true,
     };
   default:
     return state;
 }
}

export const BookProvider = ({ children }: { children: ReactNode }) => {
 const [state, dispatch] = useReducer(reducer, initialState);

 const searchForTitle = async (title: string) => {
   try {
     dispatch({
       type: "setIsLoading",
     });

     const {
       data: { docs },
     } = await AxiosInstance.get<SearchResultData>("search.json", {
       params: {
         title,
       },
     });

     dispatch({
       type: "setData",
       payload: docs,
     });
   } catch (error) {
     dispatch({
       type: "error",
     });
   }
 };

 const addToCart = (book: Book) => {
   dispatch({
     type: "addToCart",
     payload: book,
   });
 };

 const removeFromCart = (bookToRemove: Book) => {
   dispatch({
     type: "removeFromCart",
     payload: bookToRemove,
   });
 };

 return (
   <BookContext.Provider
     value={{
       data: state.data,
       cart: state.cart,
       isLoading: state.isLoading,
       error: state.error,
       searchForTitle,
       addToCart,
       removeFromCart,
     }}
   >
     {children}
   </BookContext.Provider>
 );
};
At the top, we have provided the initialState object with an InitiaStateValue type. This type is stored inside the interfaces.ts file you should create in the contexts folder and looks as below.
export interface InitiaStateValue {
   data: Array<Book> | null;
   cart: Array<Book>;
   isLoading: boolean;
   error: boolean;
   searchForTitle: (titleOfBook: string) => void;
   addToCart: (book: Book) => void;
   removeFromCart: (bookToRemove: Book) => void;
 }
Attaching this interface to the initialState will ensure that we know what must be inside this object. If we do not provide it with what it is expecting, TypeScript will let us know. Don't worry about the Book type that is visible here. It's a data object that we get from our axios GET request and I'll get to it in a bit. We also need to assign the InitiaStateValue interface to the state that is being passed inside the reducer and what is being returned from it.
The next type we have to add is the UserAction Type which holds all the possible combinations of actions we will send to the reducer. So in our case we will add the below to the interfaces.ts.
export type UserAction =
 | {
   type: 'setData';
   payload: Array<Book>;
 }
 | {
   type: 'addToCart';
   payload: Book;
 }
 | {
   type: 'removeFromCart';
   payload: Book;
 }
 | {
   type: 'setIsLoading';
 }
 | {
   type: 'error'
 }
You can see that declaring the action types lets you know what the reducer expects.

The third type we will be adding is the BookProvider function, as TypeScript needs to know it is a function that can have children inside it. We can do this by typing the children with React.ReactNode
export const BookProvider = ({ children }: { children: ReactNode }) => {
The next types we will be adding will be to the searchForTitle, addToCart, and the removeFromCart functions.
Let's go over the types of the searchForTitle function first.
const searchForTitle = async (title: string) => {
   try {
     dispatch({
       type: "setIsLoading",
     });

     const {
       data: { docs },
     } = await AxiosInstance.get<SearchResultData>("search.json", {
       params: {
         title,
       },
     });

     dispatch({
       type: "setData",
       payload: docs,
     });
   } catch (error) {
     dispatch({
       type: "error",
     });
   }
 };
Here, we declare that the title that will be fed to this function will be of type string. Then the isLoading action is dispatched before the data request is made using axios. However, notice that we specify the type of data object that we will be receiving from this GET request. We do this so that we know the type of data we are working with when using the returned data. It helps us now and in the future and any developer who takes over the project after us.
The SearchResultData interface looks like this and should be added to your interfaces.ts in the contexts folder.
export interface SearchResultData {
 numFound: number;
 start: number;
 numFoundExact: boolean;
 docs: Array<Book>;
 num_found: number;
 q: string;
 offset: null;
}

export interface Book {
 _version_: number;
 title: string;
 author_name: Array<string>;
 first_publish_year: number;
}
Moving onto the next function:
const addToCart = (book: Book) => {
   dispatch({
     type: 'add To Cart',
     payload: book,
   });
 };
The only type we need to declare here is that the book object that is being provided to this function has the type of Book that was returned to us from the axios GET request.
And the next one:
const removeFromCart = (bookToRemove: Book) => {
   dispatch({
     type: "removeFromCart",
     payload: bookToRemove,
   });
 };
The bookToRemove parameter that will be passed into this function will also be of type Book. Anything else that is passed into this function will see TypeScript doing a bit of yelling.
These are all the types we need to declare in this context file!
With that out of the way, let's wrap our entire app with the context provider, so that all our componentscan consume the state. We’ll do this by heading over to the _app.ts file and adding the below code.
import type { AppProps } from 'next/app';

import { BookProvider } from '../contexts/BookContext';

function MyApp({
 Component, pageProps,
}: AppProps) {
 return (
   <BookProvider>
     <Component {...pageProps} />
   </BookProvider>
 );
}

export default MyApp;
All that is remaining is for us to consume the state that is available to us. We can do that by heading over to the index.tsx and adding the below code. Feel free to go through it and I'll explain what is happening below.
import {
 useContext,
 useState
} from "react";
import BookList from "../components/home/BookList";
import InputBox from "../components/home/InputBox";
import { BookContext } from "../contexts/BookContext";

const Index = () => {
 const [bookTitle, setBookTitle] = useState<string>("");

 const {
   data,
   searchForTitle,
   addToCart,
   cart,
   removeFromCart,
   isLoading,
   error,
 } = useContext(BookContext);

 const searchForBook = () => {
   searchForTitle(bookTitle);
   setBookTitle("");
 };

 return (
   <section>
     <div>
       <InputBox
         setBookTitle={setBookTitle}
         bookTitle={bookTitle}
         searchForBook={searchForBook}
       >
         Welcome to the Book Search App (patent pending)
       </InputBox>
     </div>
     <div style={{ display: "flex", justifyContent: "space-between" }}>
       {data && (
         <BookList
           data={data}
           onButtonClicked={addToCart}
           isCart={false}
         />
       )}
       {isLoading && <p>Loading your results....</p>}
       {(!isLoading && error) ||
         (data?.length === 0 && (
           <p>Something went wrong, can you try another query please?</p>
         ))}
       <BookList
         data={cart}
         onButtonClicked={removeFromCart}
         isCart
       />
     </div>
   </section>
 );
};

export default Index;
We passed BookContext into the useContext hook, thereby giving us access to all the functions and values that had been passed to the provider. All we have to do now is consume them as we intended to.
So, when the user clicks enter to submit whatever value they typed, we invoke the searchForBook function which passes the bookTitle string to the searchForTitle function. The function will then make the GET request.
const searchForBook = () => {
   searchForTitle(bookTitle);
   setBookTitle("");
 };
Depending on the state of the GET request, three things can happen.
- The user will see a loading screen while their GET request is being processed.
- The user will see the data if the get request was successful.
- The user would see an error message if the GET request would be unsuccessful.
We can handle the three above states conditionally with the below code:
<div style={{ display: "flex", justifyContent: "space-between" }}>
 {data && (
   <BookList
     data={data}
     onButtonClicked={addToCart}
     isCart={false}
   />
 )}
 {isLoading && <p>Loading your results....</p>}
 {(!isLoading && error) ||
   (data?.length === 0 && (
     <p>Something went wrong, can you try another query please?</p>
   ))}
 <BookList
   data={cart}
   onButtonClicked={removeFromCart}
   isCart
 />
</div>
Notice how the data from the GET request and the cart are being passed onto a child component named “BookList”. It should be created on your components or home folder as BookList.tsx and look as follows:
import { BookListProps } from "./interfaces";

const BookList = ({ data, onButtonClicked, isCart }: BookListProps) => {
 return (
   <section style={{ width: `${isCart ? "30vw" : "60vw"}` }}>
     {data?.map((book) => (
       <div
         style={{
           border: "1px solid black",
           margin: "10px 0px",
           padding: "10px",
           backgroundColor: `${isCart && "gray"}`,
         }}
         key={book._version_}
       >
         <p>{`Name: ${book.title}`}</p>
         <p>{`Author: ${book.author_name}`}</p>
         <p>{`First published in: ${book.first_publish_year}`}</p>
         <button
           onClick={() => {
             onButtonClicked(book);
           }}
           type="button"
         >
           {isCart ? "Remove from cart" : "Add to Cart"}
         </button>
       </div>
     ))}
   </section>
 );
};

export default BookList;
The props that are passed to this component are typed in the BookListProps interface in the interfaces.ts of the components or home directory.
import { Book } from "../../contexts/interfaces";

export interface BookListProps {
   data: Array<Book>;
   onButtonClicked: (book: Book) => void;
   isCart: boolean;
}
This component's job is to take an array which contains objects of the type Book and render it. We are also passing a function (in this case it’s either addToCart or removeFromCart) that takes an object of the type Book as an argument. The final prop that is being passed is isCart. It is a Boolean value used to adjust the width, button text, and background color of this component if the data we are passing is the data from the cart.
That’s it! You can now test the implementation of the app by searching for a book, adding it to the cart, and removing books from the cart. Fear not if the above is not quite working for you, or you had some TypeScript errors. Just head over to the final branch of this repo and compare your code against it.

On a final note, notice how we used useContext to handle state in this app. However, it might be good to use Redux Toolkit (with TypeScript) if your state is more complicated than the one here. That’s because our current approach means that the whole app is re-rendered when a single value in the state is changed (hello performance issues). I wrote an article about using Redux Toolkit in Next.js and TypeScript - feel free to check it out as well!
Final thoughts
Typescript can be a bit of a doozy when you start working with it. There might even be times when you feel that it's just additional code and is actively working against you as it will keep throwing error messages at you for the simplest issue. My advice is to not get frustrated and keep working at it, as there comes a point when TypeScript becomes very useful and gives your development workflow a sense of predictability. It comes from the awareness of the data types that a function, a hook or a component requires. Typing data makes your code robust and hence so much easier for another developer to pick up from where you left off.
If you’re looking for further reading on using TypeScript with React this React-TypeScript cheatsheet is a good place to start. Thanks for reading!
Looking forward to working with TypeScript and React in your projects? How about joining us for a good start?


.svg)
.svg)
.svg)
.avif)

.avif)
.avif)
.avif)