Basic functionalities
- friendly interface of admin panel that lets you easily manage the site layout and edit individual views;
- built-in WYSIWYG (what-you-see is what-you-get) editor, which makes text formatting easy even for people not familiar with HTML syntax;
- assets management - by default every uploaded photo can be named, tagged and reused on any other page. The Wagtail image uploader also lets you search through all uploaded files;
- dynamic views - all functionalities can be coded in models and templates.
Installing Wagtail
The latest stable version is available via PyPI. In order to install Wagtail and all its dependencies, such as the latest Django version (for this moment it’s 1.9.6), all you need to do is invoke the command:
$ pip install wagtail
Now you can create a new Wagtail project using the command:
$ wagtail start <project_name>
It’s pretty similar to django-admin startproject <project_name>, but it does have few advantages:
- new project is already set up to use Wagtail;
- it creates a simple application ‘home’ that allows you to create static pages using WYSIWYG editor;
- it creates templates for error messages (e.g. 404, 500), a folder with static files (js, css) and a module with settings instead of a single configuration file.
For the sake of this article we will be using SQLite3 as our database, which is the default and needs no further configuration. However, if you need a more robust one, I recommend using PostreSQL. It requires some additional configuration, but is much more efficient when handling larger amounts of data.
We can now create database schema using the command:
$ python manage.py migrate
and create a superuser account, which will be given full access to the admin/editor panel:
$ python manage.py createsuperuser
Finally we can run the development server, which will be available via http://127.0.0.1:8000.
$ python manage.py runserver
The admin panel is by default accessible on http://127.0.0.1:8000/admin. Right now we can only create simple pages containing only one WYSIWYG field.
Sample application
In order to get a grasp of Wagtail’s capabilities, we will create a simple blog-like application that will allow us to add and list photos with descriptions and the date when the photo was taken. Later on we will implement functionality that lets us manage the site in different languages.
All the following commands should be invoked in project root directory.
Let us start by creating an application called gallery
$ python manage.py startapp gallery
Now we need to add it to installed apps tuple in the configuration file (<project_root>/settings/base.py):
INSTALLED_APPS = [
    ...

    'gallery',
]
At this moment we can add PhotoPage model to our newly created application. It will be responsible for storing data such as header, date, description, abstract and the photo itself.
from django.db import models

from wagtail.wagtailcore.models import Page
from wagtail.wagtailcore.fields import RichTextField
from wagtail.wagtailadmin.edit_handlers import FieldPanel
from wagtail.wagtailimages.edit_handlers import ImageChooserPanel

class PhotoPage(Page):
    image = models.ForeignKey(
        'wagtailimages.Image', related_name='+', on_delete=models.CASCADE)
    date = models.DateField("Photo date")
    header = models.CharField("Header", max_length=200)
    abstract = models.TextField("Abstract")
    description = RichTextField("Description")

    content_panels = Page.content_panels + [
        FieldPanel('header'),
        FieldPanel('date'),
        ImageChooserPanel('image'),
        FieldPanel('abstract'),
        FieldPanel('description'),
    ]
- we define ‘image' as a ForeignKey instead of ImageField. It lets us use an alternative photo chooser provided by Wagtail;
- ‘date’, ‘header’ and ‘abstract’ are casual Django fields;
- ‘description’ field is defined as RichTextField, which is essentially a TextField but with more editor-friendly WYSIWYG widget in the admin panel.
Each page (that is every model inheriting from Page) has, by default, 3 tabs:
- content_panels is where we should put all the fields that will be shown to end user;
- promote_panels for fields responsible for page meta data, such as slug or SEO
- settings_panel by default lets us change page publication or expiration dates. We can also put some other settings here, such as which template should the page use (Wagtail allows each object to dynamically choose proper template).
Tabs can be edited and/or extended, what is covered in greater details in the official Wagtail docs.
At this point we need to create a template. We can define a custom path in model class, but if we follow the Wagtail naming convention it won’t be necessary. If no path is specified, Wagtail will look for the template in the <app_name>/templates/<app_name> folder. The file name should be class name converted to snake case, e.g. template for PhotoPage should be named photo_page.html. Let us place it in <project_root>/gallery/templates/gallery:
{% extends "base.html" %}

{% load wagtailcore_tags %}
{% load wagtailimages_tags %}

 {% block content %}
    <h2>{{ page.header }}</h2>
    <h4>(date: {{ page.date }})</h4>
    {% image page.image width-400 %}
    {{ page.description|richtext }}
{% endblock content %}
Now, update the database
$ python manage.py makemigrations
$ python manage.py migrate
Let's go ahead and create a new type of page.
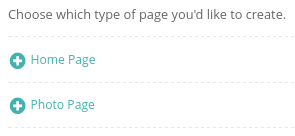
After choosing ‘Photo Page’ we will see content of content_panels. Among other things, it contains the Image Chooser that lets us upload and browse through photos - that’s why we used ForeignKey instead of Django’s ImageField.
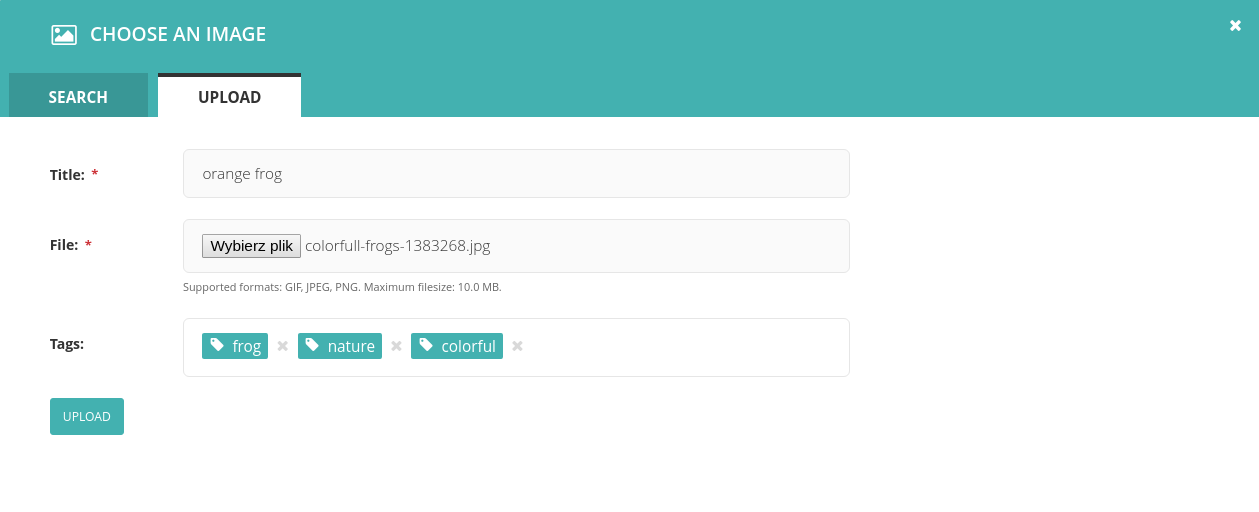
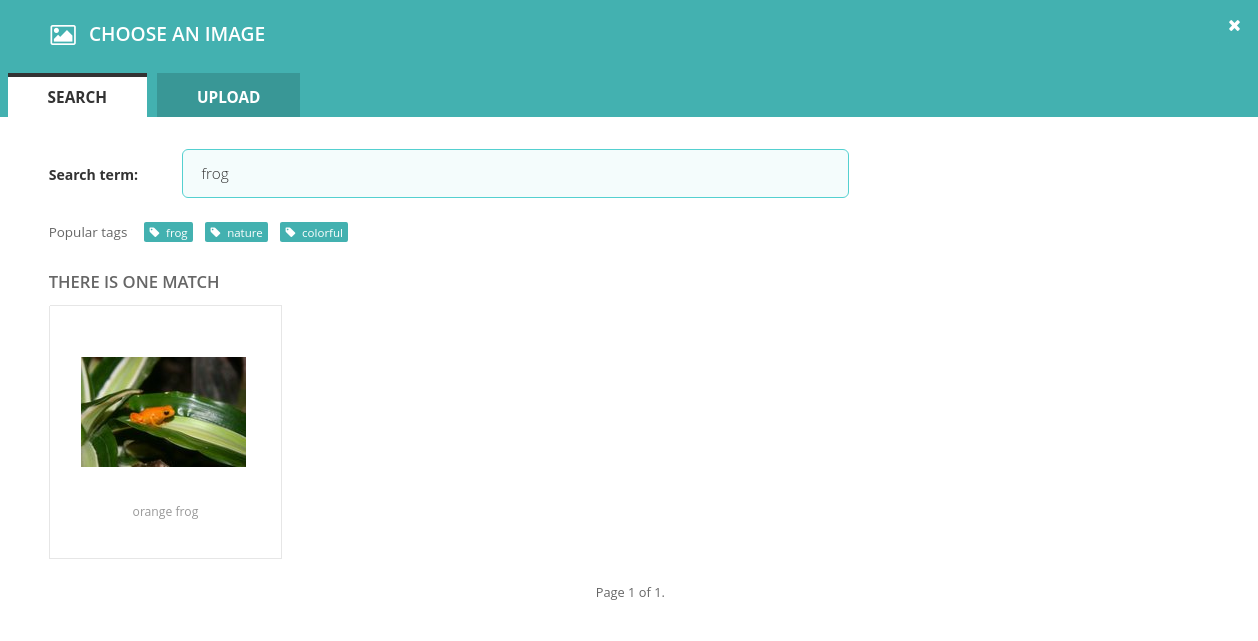
Now we should add a simple page responsible for linking all of our photo pages. We will also create an option to add a short description to the list.
class GalleryPage(Page):
    description = RichTextField("Description")

    content_panels = Page.content_panels + [
        FieldPanel('description')
    ]

    def get_context(self, *args, **kwargs):
        context = super().get_context(*args, **kwargs)
        context['photos'] = PhotoPage.objects.order_by('-first_published_at')
        return context
It contains nothing new except for the get_context method. In Wagtail you don’t need to write views even if you need to pass extra data to the template. Instead, we can extend Page’s get_context method, which is pretty similar to the get_context_data method in Django’s generic views. We fetch all the photo pages from our database and arrange them in the ascending descending order by publication date.
Following the Wagtail naming convention, we call our template gallery_page.html and put it in <project_root>/gallery/templates/gallery directory:
{% extends "base.html" %}

{% load wagtailcore_tags %}

{% block content %}
    <h2>My gallery</h2>
    {{ page.description|richtext }}
    <ul>
        {% for photo in photos %}
            <li>
                <a href="{{ photo.url }}">{{ photo.title }}</a>
            </li>
        {% endfor %}
    </ul>
{% endblock content %}
Lastly, we should update the database and run the server to see our changes live:
$ python manage.py makemigrations
$ python manage.py migrate
$ python manage.py runserver
Is there more to Wagtail?
In the first part of my article I showed how to configure environment to work with Wagtail and talked about its capabilities. As you can see, even a beginner Django developer can easily customize CMS to specific needs. At the same time Wagtail leaves a lot of room for experienced programmers to extend it’s functionality, for example adapt the administrator panel to work with multi-language websites, what will be featured in the second part of this article. Stay tuned to not miss it!
.svg)



.svg)
.svg)
.avif)

.avif)
.avif)
.avif)
