.svg)
.webp)
Core Concepts
What makes Tailwind different from the other frameworks, is that it doesn’t provide ready to use UI components. Instead, it provides you with a set of predefined CSS utility classes, which you can use to build those components yourself. On top of that, you can customize those classes inside a theme JS configuration file. After your changes, all you need to do is rebuild your output CSS with a single npm command.
Utility classes
Take a look at example below:
<div class="p-6 max-w-sm mx-auto bg-white rounded-xl shadow-md flex items-center space-x-4">
  <div class="flex-shrink-0">
    <img class="h-12 w-12" src="/img/logo.svg" alt="ChitChat Logo">
  </div>
  <div>
    <div class="text-xl font-medium text-black">ChitChat</div>
    <p class="text-gray-500">You have a new message!</p>
  </div>
</div>
Layout:
- ‘flex’, ‘flex-shrink-0’ manages flexbox values
- ‘max-w-sm’ sets max-width,
- ‘mx-auto’ centres content horizontally
- ‘p-6’ adds padding
- ‘w-12’ sets a certain width
- ‘h-12’ sets a certain height
Appearance:
- ‘bg-white’ changes background-color
- ‘rounded-xl’ adds border-radius
- ‘shadow-md’ adds box-shadow
- ‘text-xl’ - changes font-size
- ‘text-black’ - changes font-color
- ‘font-medium’ - changes font-weight
Thanks to these awesome utility classes we can compose our UI components with ease without a need to write custom CSS.
Variants
Apart from the obvious use cases of classes like ‘border-transparent’ Tailwind offers also a complex solution for state-dependent styles. It achieves it by giving you the possibility to attach a prefix called ‘variant’ to each of your utilities.
For example, state variant - hover can prefix class bg-purple-700
  <button class="bg-purple-600 hover:bg-purple-700">
    Hover me
  </button>
The following code will change the background colour to slightly darker on hover action over the button.
These are some of the variants you can choose from: ‘active’, ‘focus’, ‘hover’, ‘group-hover’. Take a look at the docs for more examples.
It is important to note that not every variant is available for every utility. For complete reference see this documentation page - you can find a full list at the bottom.
If you need to enable extra variants for a plugin in addition to what's included in the defaults, you can do it inside the global js config file.
// tailwind.config.js
module.exports = {
  variants: {
    // The 'active' variant will be generated in addition to the defaults
    extend: {
      backgroundColor: ['active']
    }
  },
}
Example from the docs
RWD
By default, there are five breakpoints
sm    640px        @media (min-width: 640px) { ... }
md    768px        @media (min-width: 768px) { ... }
lg    1024px       @media (min-width: 1024px) { ... }
xl    1280px       @media (min-width: 1280px) { ... }
2xl   1536px
The responsiveness of the components created with Tailwind is also achieved by adding the variant prefix. So, to apply utility at a certain breakpoint, you need to add a prefix with a breakpoint shorthand name.
Following code:
  <button class="w-16 md:w-32 lg:w-48”>
    Hover me
  </button>
will result in setting the width of the button to 16 by default, 32 on medium screens and 48 on the large viewport.
Theme
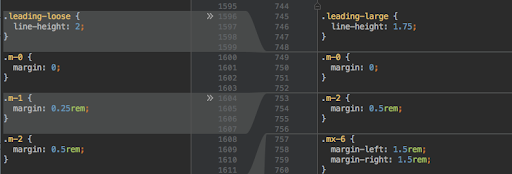
Do you need a class that sets a 5rem margin? Extend your theme by including your custom configuration as property ‘extend’.
Inside your config add the following code.
module.exports = {
  theme: {
    extend: {
      margin: {
        "96": "5rem",
      },
    }
  },
}
And that's it - you can use your ‘m[side]-96’ class now!
Do you need to use some specific colour?
You can set up your class similarly to the example above, all you have to do is:
module.exports = {
  theme: {
    extend: {
      colors: {
        cyan: '#9cdbff',
      },
    }
  },
}
Now ‘text-cyan’ is available for you - how cool is that?
Take a look for an example from the docs to have a bigger picture of what you can achieve through customizing the theme.
module.exports = {
  theme: {
    screens: {
      sm: '480px',
      md: '768px',
      lg: '976px',
      xl: '1440px',
    },
    colors: {
      gray: colors.coolGray,
      blue: colors.lightBlue,
      red: colors.rose,
      pink: colors.fuchsia,
    },
    fontFamily: {
      sans: ['Graphik', 'sans-serif'],
      serif: ['Merriweather', 'serif'],
    },
    extend: {
      spacing: {
        '128': '32rem',
        '144': '36rem',
      },
      borderRadius: {
        '4xl': '2rem',
      }
    }
  }
}
Setting it all up inside a global configuration file allows us to be consistent with using the same margins, paddings, font sizes, and all other CSS rules for all elements in our projects. Just create your config based on graphic design, add all spaces and variables and you are ready to go.
Looking for ways to make your work with CSS smooth and easy? Check our article about Emmet!
Extracting components
As the project grows, you may find yourself duplicating a lot of the code, using the same combination of classes. This can be challenging to maintain and keep it all in sync across many components.
Tailwind gives you the possibility to extract duplicated code to the components.
There are two ways to do that:
- Create a template partial or JavaScript component
<template>
    <img class="rounded" :src="img" :alt="imgAlt">
    <a :href="url" class="hover:underline">{{ title }}</a>
</template>

<script>
  export default {
    props: ['img', 'imgAlt', 'title', 'url']
  }
</script>
A simple component made with Vue.js
- Extract component classes with @apply directive
<button class="btn-indigo">  Click me </button>

<style>
  .btn-indigo {
    @apply py-2 px-4 bg-indigo-500 text-white font-semibold shadow-md hover:bg-indigo-700 focus:outline-none
  }
</style>
What about unused code? Use PurgeCSS
Worried that you will only use a small set of the framework, and a lot of unused CSS styles will be included?
Use Purgecss alongside Tailwind to remove unnecessary code from the final build. How does it work? Based on a configuration where you can select what type of files you would like to scan and search for used classes, it compares results with our final CSS file.
If there is no match, Purgecss removes unused CSS and of course, it is great news for our app performance. You can use it with CLI, JavaScript API, Webpack, PostCSS, Gulp, Grunt and Rollup.
Why should you use Tailwind?
Tailwind is one of the frameworks that take the approach of reusable, content-agnostic CSS, like other frameworks of the same type (Bootstrap, Foundation). This is obviously and as usual in the programming world a tradeoff. It does not care too much about separation of concerns, it aims to provide reusable CSS. In contrast to its competition, it tackles the subject differently.
Instead of focusing on ready UI components (which by the way are available as paid features), it provides you with a rich set of utility classes that you can use with variants to achieve desired effects. There are three main promises made by Tailwind -
- More reusable CSS, less code to write
- You don't have to worry about how to name your CSS class to fit ‘content - descriptive’ approach.
- Safer changes (e.g. removing class from a block of local HTML code won't affect any other part of your website)
Based on the experience we had with it, it seems to me that it delivers what it promises - definitely worth a try!
Keen on honing your skills within an excellent frontend team? Check our job offers!


Navigate the changing IT landscape
Some highlighted content that we want to draw attention to to link to our other resources. It usually contains a link .
.svg)
.svg)
.svg)
.avif)

.avif)
.avif)
.avif)