.svg)
.webp)
In this article we guide you through all the stages to set up a click trigger for a React-based application. Once you know the main GTM-related concepts, you are just a few configurative steps away from making use of the selected tag management functionalities. So what is Google Tag Manager and how do the functionalities of Tags and Triggers work to your advantage?
Google Tag Manager - definition and application
Google Tag Manager (GTM) is a tag management system that enables easy integration of tags on your website or mobile app, after the initial setup in the code. The main advantage that comes with using the GTM is the ability to change configurations for your tags directly from the web panel interface. Having said that, there are three main concepts to understand while working with the GTM:
- Tags are code snippets or tracking pixels (e.g. the Facebook pixel) that collect and send back the analytics data gathered on your website or mobile app.
- Triggers listen for events and decide when tags should run.
- Variables refer to the additional information that tags or triggers may need (e.g. run this tag when the url is as follows: /some/url).
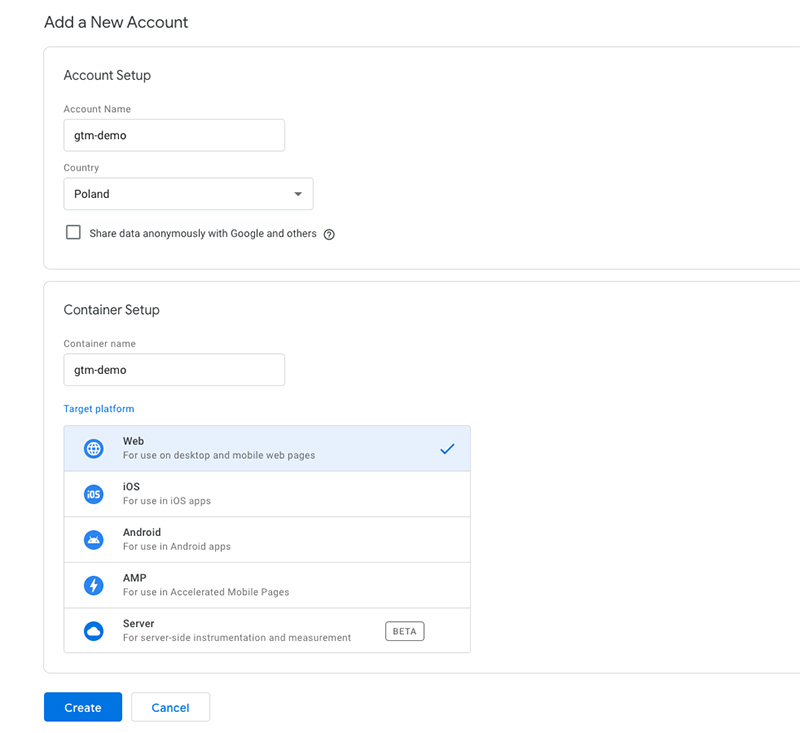
Setting up a GTM account
Go to the Google Tag Manager setup and create a new GTM account. The interface should look in the following way:
Set up a React playground
Now, we are going to set up a demo project. For this tutorial I used the React Hooks example from this repo. You can easily download it via GitZip.
Once we are inside the downloaded catalog, we need to install the dependencies first:
npm i // yarn
Then we can start the app.
npm run dev / yarn dev
Then we can start the app.
npm run dev / yarn dev
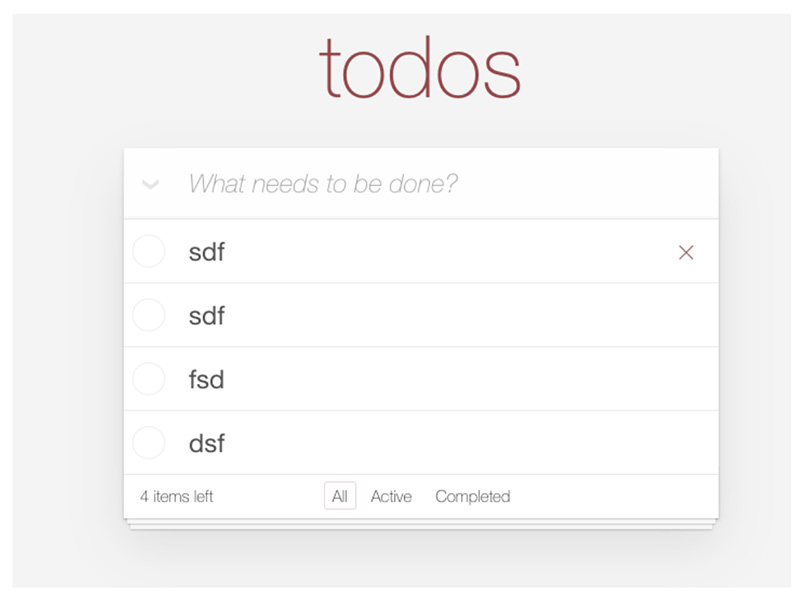
Our React Todo App is running on the http://localhost:3000/
Now we are going to install the react-gtm-module npm package which is simply a GTM wrapper for React-based apps.
npm install react-gtm-module --save
As the plugin is installed now, we can initialize the GTM in our app. In order to do that we will call the initialize method on the Tag Manager object which is provided by the react-gtm-module. Let’s now modify our index.js in the following way:
import "core-js/es6/map";
import "core-js/es6/set";
import "raf/polyfill";

import React from "react";
import ReactDOM from "react-dom";
import TagManager from 'react-gtm-module'

import "./index.css";
import App from "./App/App";
import * as serviceWorker from "./serviceWorker";


const tagManagerArgs = {
  gtmId: 'GTM-58LX4G8'
}

TagManager.initialize(tagManagerArgs)

const root = document.getElementById("root");
ReactDOM.render(<App />, root);

// If you want your app to work offline and load faster, you can change
// unregister() to register() below. Note this comes with some pitfalls.
// Learn more about service workers: http://bit.ly/CRA-PWA
serviceWorker.register();
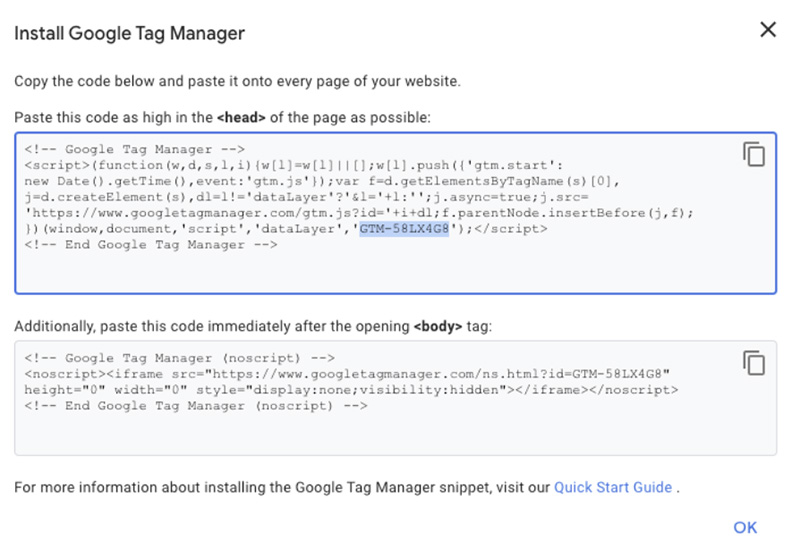
Inside the snippet above I call the initialize method on the TagManger. As an argument I pass object with gtmId key and string as a value. You can find your gtmId in the GTM installation script.
In order to check if you are connected to Google Tag Manager, open up your Chrome Developer Tools, jump to the Network tab and look for the gtm request.
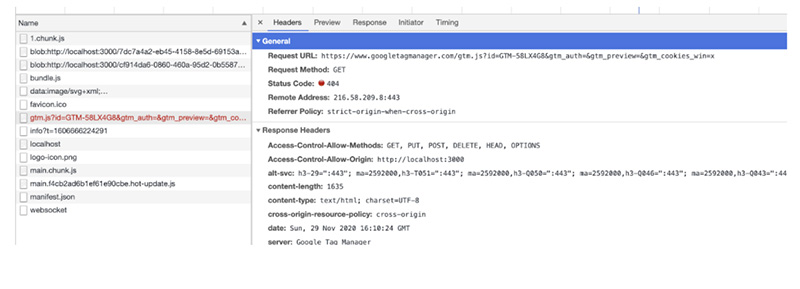
In my case, I can see that I’m getting the error 404 response, and the reason for that is that I haven't published my GTM container from the GTM panel yet.
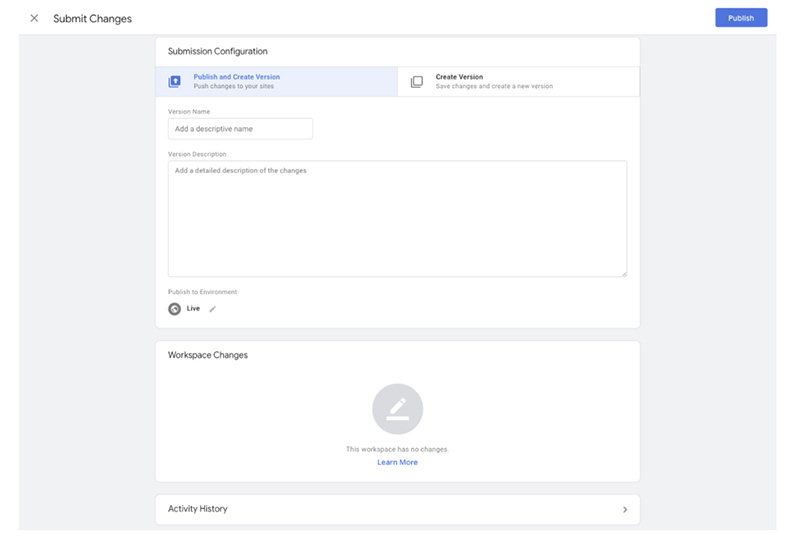
Publish the container

After clicking the “submit” button inside the GTM workspace panel, you will see another screen where you can publish and create versions.
As our first version has been published, you can see that we have established a connection with the GTM:
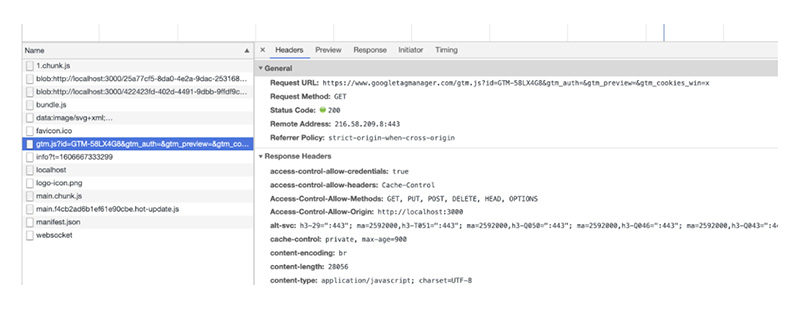
Our request returns 200 ok. Now, let’s add our first page tracking tag.
Triggers
As the Google official Help Center states:
Tags fire in response to events. In Google Tag Manager, a trigger listens to your web page or mobile app for certain types of events like form submissions, button clicks, or page views.
Function of triggers, source: Google Support - Tag Manager Help
So, summing it up, triggers listen for events and decide if tags should run.
Types of Triggers
Below you will find the available trigger types in the GTM.
- Page view trigger
- Click trigger
- Element visibility trigger
- Form submission trigger
- History change trigger
- JavaScript error trigger
- Scroll Depth trigger
- Timer trigger
- YouTube video trigger
- Custom event trigger
- Trigger group
There are countless scenarios that can be handled by those. For this article, I’ll use the Click trigger to show you the basics.
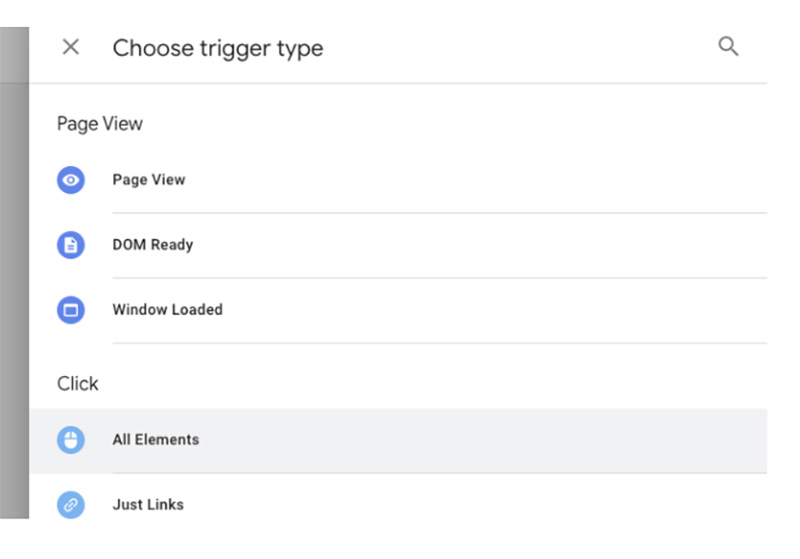
Creating a click tigger
Let's say we want to track the “x” button click, inside our TODO React App - the one which is responsible for deleting the item. Our button is located inside the TodoItem.js file. It already has a “destroy” class which we can use to track it.
<button className="destroy" onClick={onDelete} />
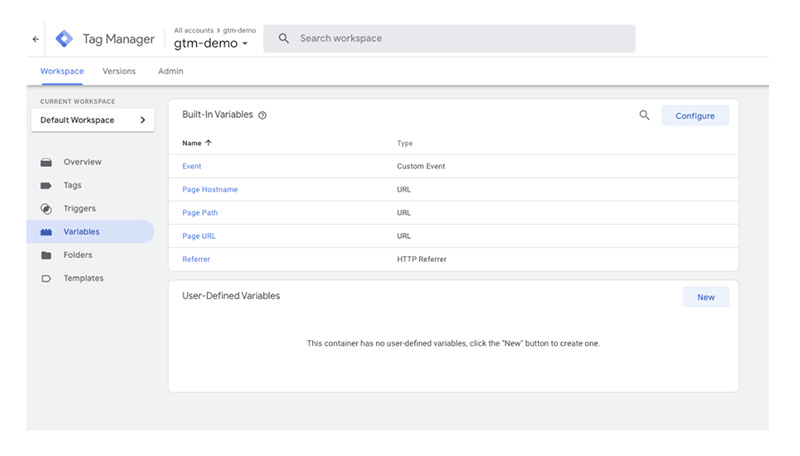
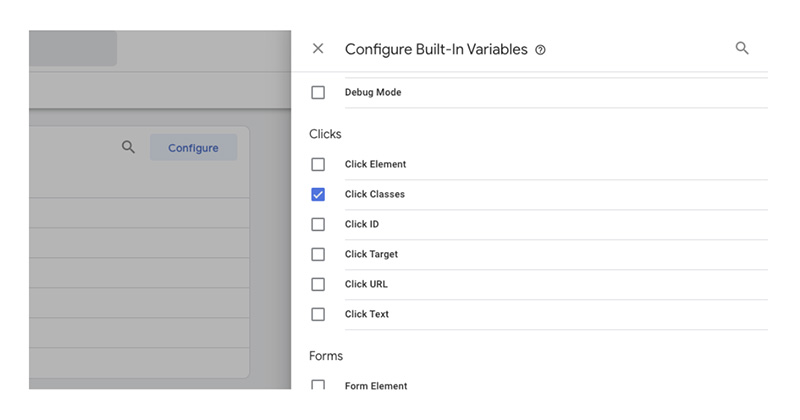
First, we need to configure the variables.
Click the CONFIGURE button in the top right-hand corner of the panel, and mark “Click Classes”.
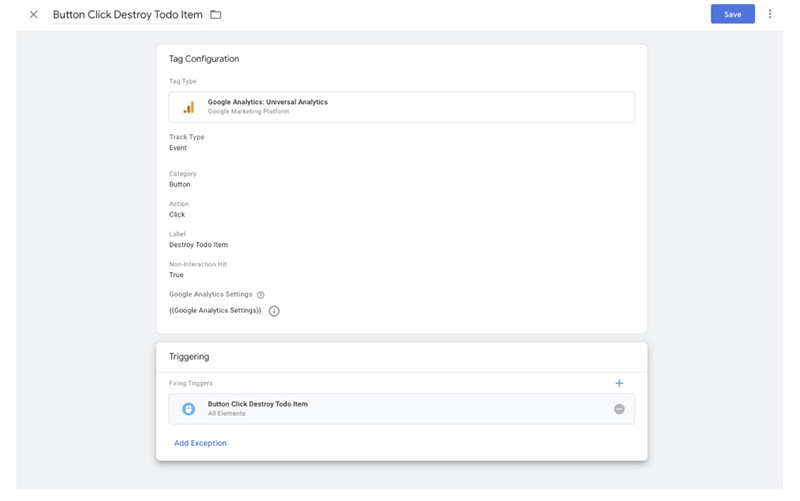
Our next step is to create a tag which will send data to Google Analytics (GA).
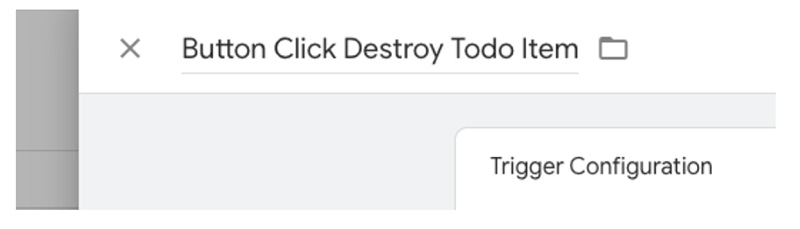
- Name the tag. In my example, I named it the “Button Click Destroy Todo Item”.

- Choose the tag type - select Google Analytics: Universal Analytics.

- Configure the tag - Choose the ‘Event track Type, and put “Button” in the Category field and Click’ in the Action field. In my case, the Label will be “Destroy Todo Item”.
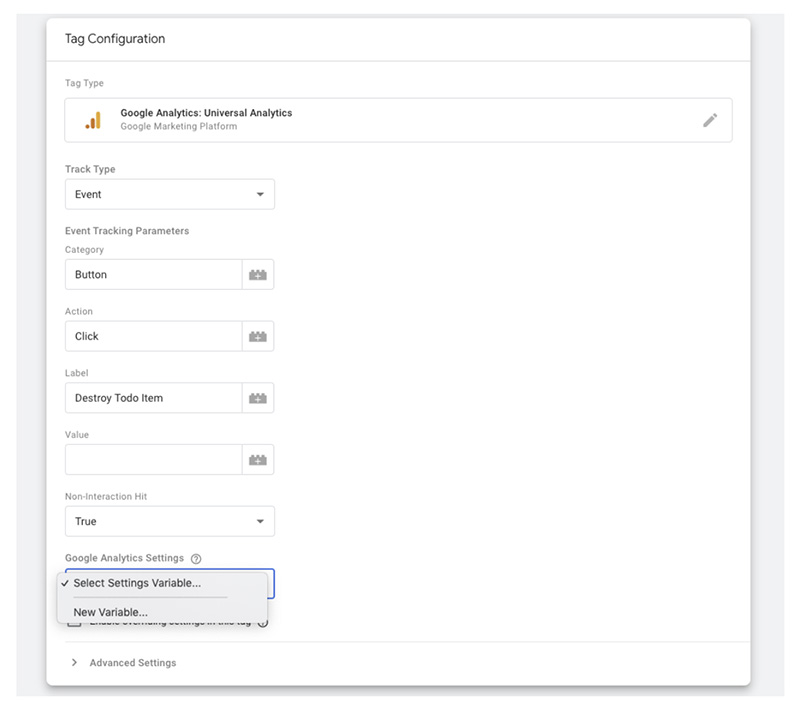
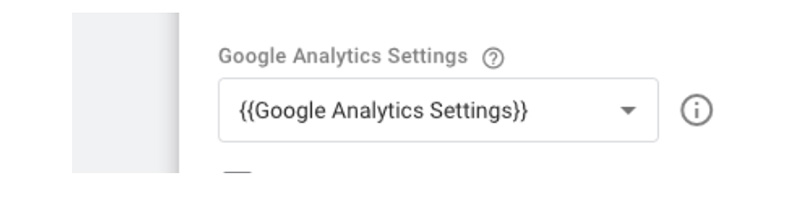
Moreover, we need to select the settings variable and since this is a brand new setup, we haven’t got our Google Analytics Settings variable yet, so we need to create one.
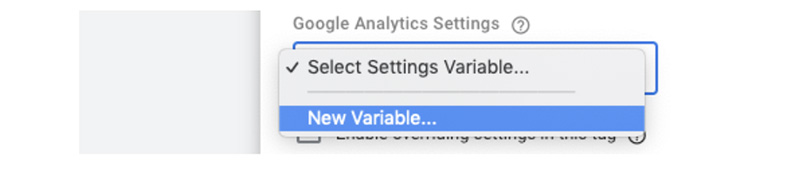
Name your GA settings variable, type your GA tracking ID and click “Save”.
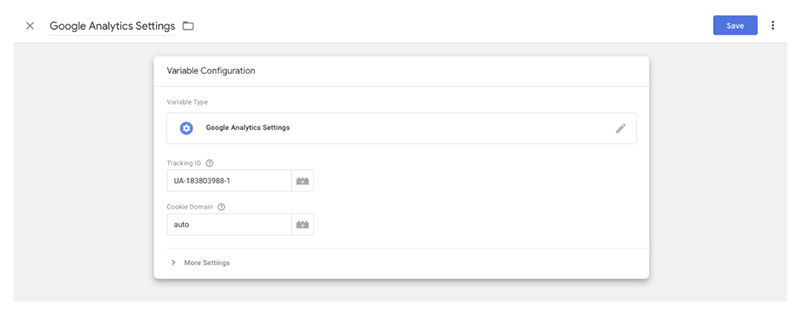
After saving, choose the variable in the Select box.
Now, let’s create a new trigger. Click the edit icon in the Triggering section.
Then, click the + button in the top right-hand corner.
Name the trigger..
...and choose the trigger type, by editing it’s configuration (use the pen icon). Choose the All Elements type.
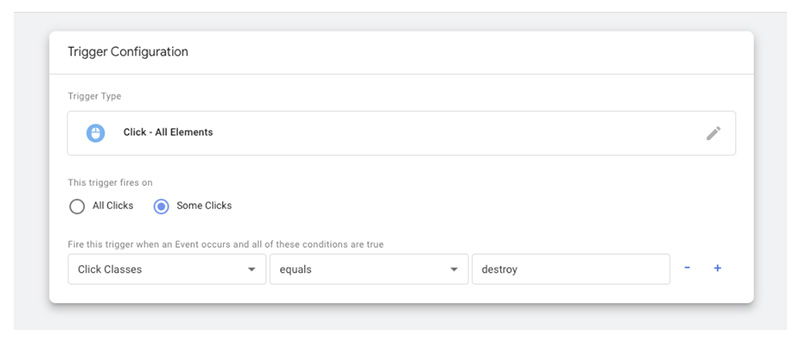
Now we need to configure the trigger. Choose, “Some Clicks”, as we would like to track specific clicks on our chosen button. To identify this button element, we will select “Click Classes” and “equals” to set the system to search for buttons with the css class that we pass on the last input. In my case, it’s the ”destroy” class.
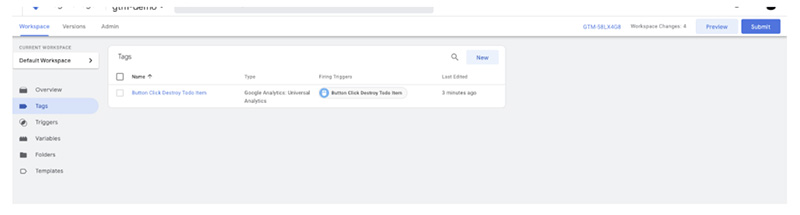
Finally, we can save the tag.
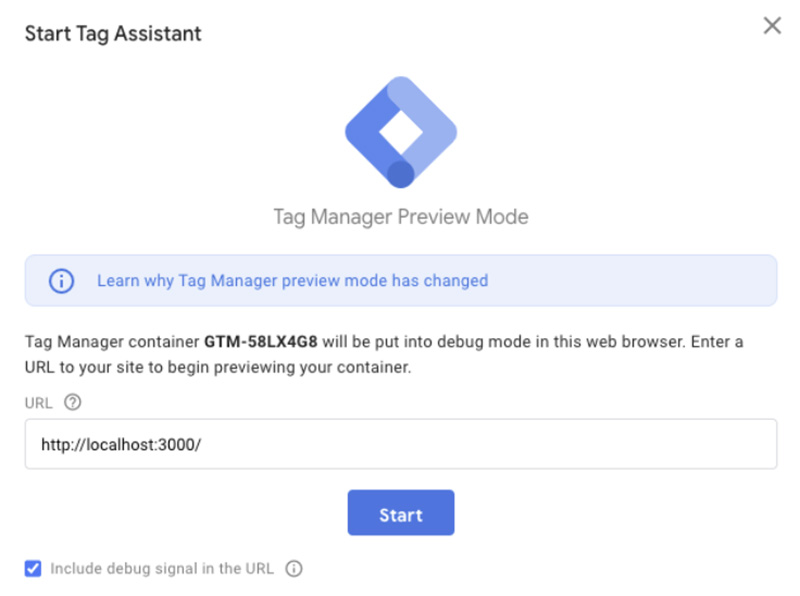
So, if we did everything correctly, we should be able to check the effects of our work in the Preview mode. In order to do that, click the Preview button.
Pass the URL, for testing we can just use localhost.
Inside the preview mode in our Todo application, I deleted 3 items, by clicking the “x” button, which is hooked to the GTM, to check if everything works fine.
Now, inside the Google Analytics (GA) console, open the Realtime page and navigate to Events.
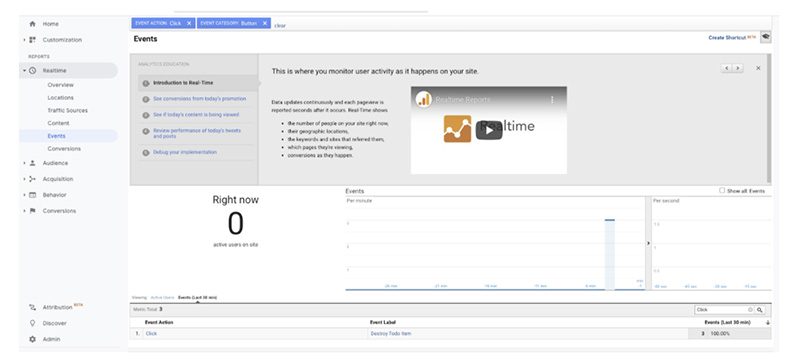
As you can see on the screenshot, the data about our “destroy” button clicks was successfully sent to GA. That’s it for now then!
Wrap up
Summing up, to get the ball rolling with Tags and Triggers in GTM we need to cover a few basic steps. In our case, after going through the initial GTM account creation, we initialized the GTM inside our React playground project with the help of the react-gtm-module npm package. Afterwards, we created a sample trigger such as our click trigger. In the end, we navigated to the Events section of Google Analytics to check whether the GA received its valuable data. Voila - we’re done with the basic tags and triggers configuration - you can now start adjusting the tags to your specific needs!
Interested in the frontend? Explore our current recruitment possibilities and join our team!


Navigate the changing IT landscape
Some highlighted content that we want to draw attention to to link to our other resources. It usually contains a link .
.svg)
.svg)
.svg)
.avif)

.avif)
.avif)
.avif)